Hosted Fields
Ce produit est en mode pilote. Contactez-nous pour devenir un pilote.
- Nous déléguer la gestion des données sensibles pour garantir votre conformité PCI
- Pousser au maximum l’adaptation visuelle et la personnalisation
- Faciliter les futurs achats et les paiements via Card On File pour vos clients !
Commencer
Pour traiter des transactions sur notre plateforme avec cette solution, assurez-vous que :
- Vous avez un compte sur notre plateforme.
- Au moins un des moyens de paiement suivants est activé dans le Merchant Portal via Affaires > Méthodes de paiement:
American ExpressCartes BancairesDankortDinersJCBMaestroMasterCardUPI - UnionPay InternationalVisa
Utilisez-vous le Back Office ?
Vous pouvez vérifier le statut d'activation de la méthode de paiement via Configuration > Activation PM. - Vous avez configuré votre Clé API et Secret API dans votre compte.
- Votre serveur peut traiter des requêtes serveur-à-serveur via notre API RESTful.
Êtes-vous prêt ? Alors apprenez à utiliser notre Hosted Fields dans le prochain chapitre !
Comment ça fonctionne
Avant de traiter des transactions en production, utilisez notre environnement de test. Découvrez notre solution sans frais ni engagements ! Une fois que vous souhaitez passer en production, consultez ici comment obtenir un compte de production ou contactez-nous !
Pour être éligible au SAQ-A pour cette méthode d'intégration, vous devez respecter les critères d'éligibilité. Consultez la bibliothèque du PCI Security Standards Council pour une vue d'ensemble complète.
Les Hosted Fields fonctionnent en conjonction avec la méthode d'intégration Server-to-server, qui est une étape indispensable dans le flux de paiement. Par conséquent, cela nécessite d'inclure au moins les propriétés 3-D Secure obligatoires dans votre demande de paiement.
Ciblez l'URL de base de l'API la plus à jour
Nous vous encourageons à toujours cibler l'URL de base de l'API la plus à jour lors de l'envoi de requêtes à notre plateforme. Consultez notre guide dédié pour un aperçu complet.
Pour vous permettre une transition en douceur, les anciennes URL de base de l'API restent disponibles jusqu'à nouvel ordre.
Différences entre Hosted Fields et Hosted Tokenization Page
Les solutions Hosted Fields et Hosted Tokenization Page reposent sur le même principe : externaliser les données sensibles dans des instances <iframe> que nous hébergeons, ce qui vous permet de conserver un niveau de conformité PCI limité.
Cependant, elles présentent des différences notables. Parcourez-les pour comprendre le fonctionnement de chaque solution :
| Élément | Hosted Fields | Hosted Tokenization Page |
|---|---|---|
| Caractéristiques des instances <iframe> | Chaque champ sensible est un <iframe> distinct. | L’ensemble du formulaire de paiement se trouve dans un seul <iframe>. |
| Chaque <div>/<iframe> peut être positionné individuellement sur la page de checkout. | Le <iframe> est un élément indivisible à intégrer à la page de checkout. | |
| Le <iframe> peut être personnalisé via CSS, sans modèle nécessaire. | Peut être personnalisé globalement via un template téléversé. | |
| Chaque <div>/<iframe> dispose de son propre gestionnaire d’événements, fournissant des informations détaillées pour tous les scénarios possibles. | Le <iframe> dispose d’un seul gestionnaire d’événements pour tous ses champs, fournissant uniquement des informations de base sur le statut global du formulaire de paiement. | |
| Bibliothèque JavaScript Worldline |
Doit être récupérée pour chaque session Hosted Fields. Doit être configurée dynamiquement (soft‑coded) dans le front-end de votre page de checkout. |
URL identique pour chaque requête. Peut être configurée en dur (hard‑coded) dans le front-end de votre page de checkout. |
Étapes d'intégration
Vos clients doivent saisir leur numéro de carte de crédit à un moment donné de leur parcours sur votre boutique en ligne. En tant que commerçant, le principal défi est de relier toutes les étapes de ce parcours en une expérience fluide, tout en garantissant la transmission sécurisée des données de vos clients vers les institutions financières qui les traitent.
Pour cela, vous pouvez :
- Externaliser totalement les mesures de sécurité nécessaires (en utilisant notre solution Hosted Checkout Page). Cependant, cette méthode a des limites : vos clients constatent une redirection vers une URL externe, ce qui crée une rupture visible dans le flux de paiement.
- Collecter vous‑même les données sensibles (en utilisant notre solution Server-to-server). Mais cela vous impose de satisfaire aux exigences PCI les plus strictes, ce qui implique un effort considérable.
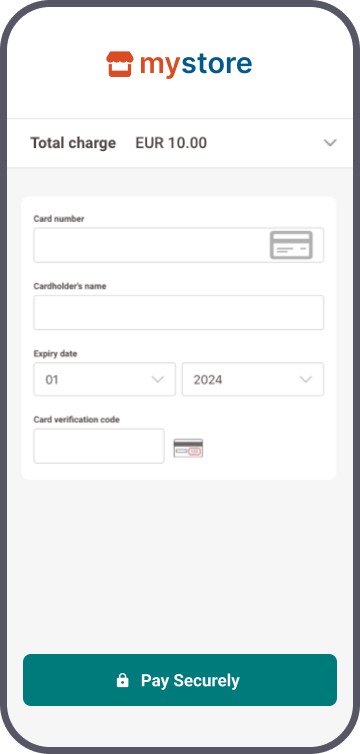
- Implémenter la Hosted Tokenization Page sur votre page de checkout pour trouver un compromis entre les modes d’intégration Hosted Checkout Page et Server-to-server. Toutefois, même si elle offre de la flexibilité, son <iframe> ne peut être personnalisé que globalement.
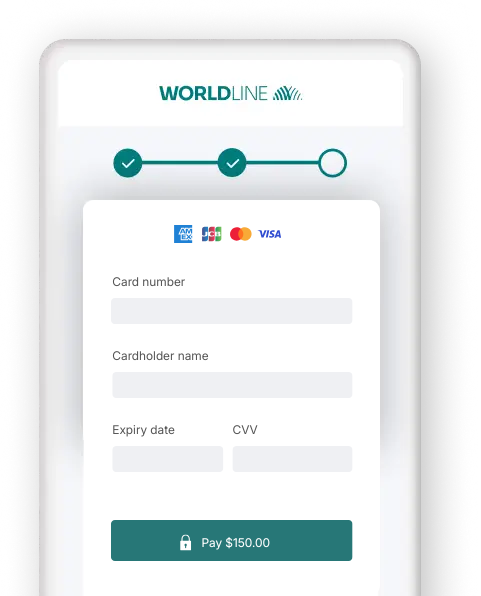
Notre solution Hosted Fields fait passer la Hosted Tokenization Page au niveau supérieur : au lieu d’ajouter/personnaliser l’ensemble du formulaire de paiement sur votre page de checkout, ajoutez et personnalisez les champs de données de carte individuellement :
- Laissez‑nous gérer les données de carte de crédit sans que vos clients ne le remarquent. Ajoutez simplement des instances
<iframe>individuelles à la page de checkout de votre boutique, en fractionnant le formulaire de paiement comme vous le souhaitez. Comme nous hébergeons toutes les instances<iframe>, les données sensibles arrivent et restent chez nous ! Nous remplaçons le numéro de carte réel par unhostedFieldsSessionId, qui n’est pas dans le périmètre PCI. - Utilisez ce
hostedFieldsSessionIdpour la requête de paiement proprement dite via le mode d’intégration Server-to-server. - Intégrez les instances
<iframe>de manière transparente dans le look & feel de votre boutique. Adaptez la page de checkout de votre boutique en ligne exactement comme vous le souhaitez !
Notre solution Hosted Fields fonctionne avec tous les moyens de paiement par carte.
Les chapitres suivants proposent une vue d’ensemble de haut niveau d’une cinématique typique. Ils décrivent toutes les étapes à suivre pour traiter des transactions Hosted Checkout Page. Retrouvez une vue détaillée incluant les étapes optionnelles, l’authentification 3-D Secure, etc. dans le chapitre dédié.
- Créer la page de checkout
- Initialisez votre système
- Créer une session HostedFields
- Charger la bibliothèque JavaScript sur la page de checkout
- Initialiser Hosted Fields sur la page de checkout
- Soumettre et tokeniser les données de carte
- Envoyer la requête CreatePayment
- Traiter la réponse de la plateforme
- Obtenir & afficher le résultat de la transaction
Créer la page de checkout
Notre solution Hosted Fields nécessite que votre page de checkout implémente des éléments HTML/
<script id="hosted-fields-sdk" crossorigin="anonymous"></script>

<form id="payment-form" novalidate>
 <div id="cardholderName"></div>
	 <div id="cardNumber"></div>
	 <div id="expiryDate"></div>
	 <div id="csc"></div>
	 <div id="cardBrands"></div>
<button id="submit-button" type="submit" disabled>Pay</button>
</form>


<script>

// Store our platform’s response to the CreateHostedSession request
var apiResponse;

document.addEventListener(‘DOMContentLoaded’, () => {

	const sdkScript = document.getElementById(‘hosted-fields-sdk’);
	sdkScript.src = apiResponse.sdkUrl;
	sdkScript.integrity = ‘sha256-${apiResponse.sdkSri}’;
	sdkScript.onload = () => initializeHostedFields(apiResponse);
});

function initializeHostedFields(apiResponse) {
	const submitButton = document.getElementById('submit-button');
	const resultDisplay = document.getElementById('result-display');
	const config = {
		"sessionData": apiResponse.sessionData,
		"logLevel": "debug",
		"style": {
			"input": {
			"color": "#000000",
			"font-family": "courier, monospace",
			"font-size": "14px"
			},
			"input::placeholder": {
				"color": "#999999"
				}
			},
		"fields": {
			"cardNumber": {
				"id": "cardNumber",
				"title": "Your card number",
				"placeholder": "0000 0000 0000 0000"
			},
			"cardholderName": {
				"id": "cardholderName",
				"title": "Your name",
				"placeholder": "John"
			},
			"cardBrands": {
				"id": "cardBrands",
				"title": "Your card brand",
				"placeholder": "VISA"
			},
			"expiryDate": {
				"id": "expiryDate",
				"caption": "Your card expiration date",
				"checkExpiredDate": "true",
				"placeholder": "MM/YY"
			},
			"csc": {
				"id": "csc",
				"title": "Your card security code",
				"caption": "Your card security code",
				"placeholder": "123"
			}
		},
		"additionalInput": {
		    "cardholder": ""
		    }
		}
	}

	const hostedFields = sdpx.hostedfields.create(config);

	// Add event listeners
	hostedFields.on("focus", evt => console.log(evt.fieldId + " Focused"));
	hostedFields.on("blur", evt => console.log(evt.fieldId + " Blurred"));
	hostedFields.on("empty", evt => console.log(evt.fieldId + " Empty"));
	hostedFields.on("valid", evt => console.log(evt.fieldId + " Valid"));
	hostedFields.on("invalid", evt => console.log(evt.fieldId + " Invalid"));
	hostedFields.on("field-ready", evt => console.log(evt.fieldId + " Field ready"));
	hostedFields.on("all-fields-ready", evt => console.log(evt.fieldId + " All fields ready"));
	hostedFields.on("error-init-fields", evt => console.log(evt.fieldId + " Error initiating fields"));
	hostedFields.on("card-brand-selected", evt => console.log(evt.fieldId + " Card brand selected"));
	hostedFields.on("card-brand-entry", evt => console.log(evt.fieldId + " Card brand entry"));
	hostedFields.on("error", evt => console.log(evt.fieldId + " error"));


	document.getElementById('payment-form').addEventListener('submit', (event) =>
	{
		const handleSubmit = async (onSuccess, onError) => {
		if (!hostedFieldsInstance) return;
		setIsSubmitting(true);
		setError(null);
		hostedFieldsInstance.tokenize(true).then(() => {
		console.log("Tokenize succeed");
		//CreatePayment via Server-to-server using apiResponse.hostedFieldSesssionId
		}).catch(err => console.error("Error"))
	}
	});
}
</script>
Les différents éléments remplissent un rôle spécifique dans la cinématique de paiement :
| Élément | Description |
|---|---|
|
Cet élément <form> constitue le masque de paiement pour la saisie des données de carte sur votre page de checkout. Il contient des instances <div> distinctes pour chaque champ du formulaire de paiement. Lors de l’initialisation de Hosted Fields via la variable var config, un <iframe> est ajouté dans chaque instance <div>. Chaque <iframe> charge une page contenant un seul champ <input> pour la saisie des données de carte. |
|
Chargez la bibliothèque JavaScript Hosted Fields qui est utilisée pour
Comme la valeur de l’attribut src est différente pour chaque requête, vous devez la définir dynamiquement (soft‑coding). Veillez à charger le script depuis notre serveur plutôt que de l’héberger vous‑même. |
|
Stocke la réponse de notre plateforme à votre requête CreateHostedFields. |
|
Chargez la bibliothèque JavaScript Hosted Fields sur votre page de checkout pour tokeniser les données de carte. |
|
Initialise the Hosted Fields (the
Les instances <div> au sein de l’élément <form>, y compris leur look & feel, afin de les intégrer à votre page de checkout.
|
|
Tokeniser les données de carte présentes dans le <form>. Définissez tokenize() sur true ou false en fonction de votre cas d'usage : Si vous définissez cette propriété sur true, assurez-vous d'obtenir le consentement de vos clients pour stocker/réutiliser leurs données de carte sur notre plateforme. |
Initialisez votre système
Initialisez votre système pour l’envoi de requêtes vers notre API GoPay en :
- Définissant les URLs des endpoints de test et de production.
- Activant votre PSPID test/production sur notre plateforme.
- Configurant une paire clé / secret d’API pour les environnements de test et de production.
- Assurez-vous d'utiliser le bon endpoint et de renseigner l'URL de production dès que vous avez terminé vos tests.
- Les données dans notre chapitre Cas de test fonctionnent UNIQUEMENT pour les demandes de paiement dans notre environnement de test. Utiliser ces données dans notre environnement de production entraînera des résultats de test indésirables.
Créer une session HostedFields
Le backend de l’application de votre boutique en ligne envoie une requête CreateHostedFields à notre plateforme :
// Create a URI for our TEST/LIVE environment
final URI apiEndpoint = URI.create("https://payment.preprod.direct.worldline-solutions.com");
// Initialise the client with the apikey, apisecret and URI
final Authenticator authenticator = new V1HmacAuthenticator("YourAPIkey", "YourAPISecret");
final MetadataProvider metadataProvider = new DefaultMetadataProvider("OnlinePayments");
final DefaultConnection defaultConnection = new DefaultConnection(5000, 10000, 1000);
ClientInterface client = Factory.createClient(apiEndpoint, defaultConnection, authenticator, metadataProvider);
CreateHostedFieldsSessionRequest request = new CreateHostedFieldsSessionRequest()
.withLocale("en-US");
// Create HostedFields Session
CreateHostedFieldsSessionResponse response = client
.merchant("YourPSPID")
.hostedFields()
.createHostedFieldsSession(request);
// Retrieve the hostedFieldsSessionId
String hostedFieldsSessionId = response.getSessionData().getHostedFieldsSessionId();// Create a URI for our TEST/LIVE environment
Uri apiEndpoint = new Uri("https://payment.preprod.direct.worldline-solutions.com/");
// Initialise the client with the apikey, apisecret and URI
IClient client = Factory.CreateClient(new CommunicatorConfiguration()
{
ApiKeyId = "YourAPIkey",
SecretApiKey = "YourAPISecret",
Integrator = "YourCompanyName",
ApiEndpoint = apiEndpoint,
});
CreateHostedFieldsSessionRequest request = new CreateHostedFieldsSessionRequest
{
Locale = "en-US"
};
// Create HostedFields Session
CreateHostedFieldsSessionResponse response = await client
.WithNewMerchant("YourPSPID")
.HostedFields
.CreateHostedFieldsSession(request);
// Retrieve the hostedFieldsSessionId
string hostedFieldsSessionId = response.SessionData.HostedFieldsSessionId;// Initialise the client with the apikey, apisecret and URI
const client = directSdk.init({
host: "payment.preprod.direct.worldline-solutions.com",
apiKeyId: "YourAPIkey",
secretApiKey: "YourAPISecret",
integrator: "OnlinePayments"
});
const createHostedFieldsSessionRequest = {
locale: "en-US"
};
// Create HostedFields Session
const createHostedFieldsSessionResponse = await client.hostedFields.createHostedFieldsSession(
"YourPSPID",
createHostedFieldsSessionRequest,
null
);
// Retrieve the hostedFieldsSessionId
string hostedFieldsSessionId = createHostedFieldsSessionResponse.sessionData.hostedFieldsSessionId;// Create a CommunicatorConfiguration with the apiKey, apiSecret and apiEndpoint
$communicatorConfiguration = new CommunicatorConfiguration(
"YourAPIkey",
"YourAPISecret",
"https://payment.preprod.direct.worldline-solutions.com",
"YourCompanyName"
);
$authenticator = new V1HmacAuthenticator($communicatorConfiguration);
$communicator = new Communicator($communicatorConfiguration, $authenticator);
// Initiate a Client
$client = new Client($communicator);
$createHostedFieldsSessionRequest = new CreateHostedFieldsSessionRequest();
$createHostedFieldsSessionRequest->setLocale("en-US");
// Create HostedFields Session
$createHostedFieldsSessionResponse = $client->merchant("YourPSPID")->hostedFields()->createHostedFieldsSession($createHostedFieldsSessionRequest);
// Retrieve the hostedFieldsSessionId
$hostedFieldsSessionId = $createHostedFieldsSessionResponse->getSessionData()->getHostedFieldsSessionId();# Create a CommunicatorConfiguration with the apiKey, apiSecret and apiEndpoint
communicator_configuration = CommunicatorConfiguration(
api_endpoint="https://payment.preprod.direct.worldline-solutions.com",
api_key_id="YourAPIkey",
secret_api_key="YourAPISecret",
authorization_type="v1HMAC",
integrator="YourCompanyName",
connect_timeout=5000,
socket_timeout=10000,
max_connections=10
)
communicator = Factory.create_communicator_from_configuration(communicator_configuration)
# Initiate a Client
client = Factory.create_client_from_communicator(communicator)
create_hosted_fields_session_request = CreateHostedFieldsSessionRequest()
create_hosted_fields_session_request.locale = "en-US"
# Create HostedFields Session
create_hosted_fields_session_response = client.merchant("YourPSPID").hosted_fields().create_hosted_fields_session(create_hosted_fields_session_request)
# Retrieve the hosted_fields_session_id
hosted_fields_session_id = create_hosted_fields_session_response.session_data.hosted_fields_session_id# Create a CommunicatorConfiguration with the apiKey, apiSecret and apiEndpoint
communication_configuration = OnlinePayments::SDK::CommunicatorConfiguration.new(
integrator: "OnlinePayments",
api_endpoint: "https://payment.preprod.direct.worldline-solutions.com",
api_key_id: "YourAPIKey",
secret_api_key: "YourAPISecret",
authorization_type: "v1HMAC",
connect_timeout: 5000,
socket_timeout: 10000,
max_connections: 10
)
# Initiate a Client
client = OnlinePayments::SDK::Factory.create_client_from_configuration(communication_configuration)
create_hosted_fields_session_request = OnlinePayments::SDK::Domain::CreateHostedFieldsSessionRequest.new
create_hosted_fields_session_request.locale = "en-US"
# Create HostedFields Session
create_hosted_fields_session_response = client.merchant("YourPSPID").hosted_fields.create_hosted_fields_session(create_hosted_fields_session_request)
# Retrieve the hosted_fields_session_id
hosted_fields_session_id = create_hosted_fields_session_response.session_data.hosted_fields_session_idSi vous souhaitez préremplir les Hosted Fields avec des données de carte enregistrées pour des paiements en 1‑clic, veillez à inclure la propriété tokens dans votre requête.
URLs des endpoints en test / production
- Endpoint URL TEST : https://payment.preprod.direct.worldline-solutions.com/{merchantId}/hostedfields/sessions
- Endpoint URL LIVE : https://payment.direct.worldline-solutions.com/{merchantId}/hostedfields/sessions
Remplacez « {merchantId} » par votre compte test/production sur notre plateforme. Pour en savoir plus sur le « merchantId », consultez notre glossaire.
Dans notre réponse, notre plateforme renvoie les données suivantes :
| Propriété | Description |
|---|---|
| sdkSri | La référence subresource integrity de la bibliothèque JavaScript (sdkUrl). Ajoutez‑la en tant qu’attribut HTML integrity à la bibliothèque JavaScript Hosted Fields. |
| sdkUrl |
La bibliothèque JavaScript Hosted Fields utilisée dans les étapes suivantes de la cinématique de paiement. Chargez cette bibliothèque en tant qu’élément <script> distinct sur la page de checkout. Cette bibliothèque est utilisée pour :
|
| sessionData |
L’objet sessionData contient toutes les données nécessaires pour les étapes suivantes. N'accédez pas aux propriétés de l'objet. Utilisez toujours l'objet lui‑même pour initialiser la session Hosted Fields. |
Charger la bibliothèque JavaScript sur la page de checkout
Chargez la bibliothèque JavaScript Hosted Fields que vous avez reçue à l’étape précédente via l'objet sessionData.
Ajoutez apiResponse.sdkUrl comme élément <script> distinct sur votre page de checkout contenant l’élément <form>. Pour renforcer la sécurité, ajoutez apiResponse.sdrSri comme attribut HTML integrity.
La bibliothèque est utilisée dans les étapes suivantes pour :
<script id="hosted-fields-sdk" src="..." integrity="sha384-..." crossorigin="anonymous"></script>
document.addEventListener('DOMContentLoaded', () => {

	const sdkScript = document.getElementById('hosted-fields-sdk');
	sdkScript.src = apiResponse.sdkUrl;
	sdkScript.integrity = 'sha256-${apiResponse.sdkSri}';

	sdkScript.onload = () => initializeHostedFields(apiResponse);
});Comme la valeur de l’attribut src est différente pour chaque requête, vous devez la définir dynamiquement (soft‑coding). Veillez à charger le script depuis notre serveur plutôt que de l’héberger vous‑même.
Initialiser Hosted Fields sur la page de checkout
Préparez un objet de configuration config à partir de l’objet sessionData et initialisez hostedFields. Ajoutez des gestionnaires d’événements (event listeners) pour réagir aux interactions utilisateur (par ex. afficher des erreurs, mettre à jour l’interface).
Le gestionnaire d’événement du bouton <button> permet aux utilisateurs d’envoyer les données de carte à notre plateforme pour tokenisation à l’étape suivante.
function initializeHostedFields(apiResponse) {
	const submitButton = document.getElementById('submit-button');
	const resultDisplay = document.getElementById('result-display');
	const config = {
		"sessionData": apiResponse.sessionData,
		"logLevel": "debug",
		"style": {
			"input": {
			"color": "#000000",
			"font-family": "courier, monospace",
			"font-size": "14px"
			},
			"input::placeholder": {
				"color": "#999999"
				}
			},
		"fields": {
			"cardNumber": {
				"id": "cardNumber",
				"title": "Your card number",
				"placeholder": "0000 0000 0000 0000"
			},
			"cardholderName": {
				"id": "cardholderName",
				"title": "Your name",
				"placeholder": "John"
			},
			"cardBrands": {
				"id": "cardBrands",
				"title": "Your card brand",
				"placeholder": "VISA"
			},
			"expiryDate": {
				"id": "expiryDate",
				"caption": "Your card expiration date",
				"checkExpiredDate": "true",
				"placeholder": "MM/YY"
			},
			"csc": {
				"id": "csc",
				"title": "Your card security code",
				"caption": "Your card security code",
				"placeholder": "123"
			}
		}
	}

	const hostedFields = sdpx.hostedfields.create(config);

	// Add event listeners
        hostedFields.on("focus", evt => console.log(evt.fieldId + " Focused"));
	hostedFields.on("blur", evt => console.log(evt.fieldId + " Blurred"));
	hostedFields.on("empty", evt => console.log(evt.fieldId + " Empty"));
	hostedFields.on("valid", evt => console.log(evt.fieldId + " Valid"));
	hostedFields.on("invalid", evt => console.log(evt.fieldId + " Invalid"));
	hostedFields.on("field-ready", evt => console.log(evt.fieldId + " Field ready"));
	hostedFields.on("all-fields-ready", evt => console.log(evt.fieldId + " All fields ready"));
	hostedFields.on("error-init-fields", evt => console.log(evt.fieldId + " Error initiating fields"));
	hostedFields.on("card-brand-selected", evt => console.log(evt.fieldId + " Card brand selected"));
	hostedFields.on("card-brand-entry", evt => console.log(evt.fieldId + " Card brand entry"));
	hostedFields.on("error", evt => console.log(evt.fieldId + " error"));

	document.getElementById('payment-form').addEventListener('submit', (event) =>
	{
	const handleSubmit = async (onSuccess, onError) => {
        if (!hostedFieldsInstance) return;
        setIsSubmitting(true);
        setError(null);
        hostedFieldsInstance.tokenize(true).then(() => {
      console.log("Tokenize succeed");
      //Create Payment S2S using apiResponse.hostedFieldSesssionId
    }).catch(err => console.error("Error"))
		}
	});
}
Cela insère des instances <iframe> dans les éléments <div> du formulaire <form>. Chaque <iframe> charge une page contenant un champ <input> individuel pour chaque donnée de carte :
Numéro de carte
Nom du porteur de carte
Marque de carte
Date d’expiration
CVV
Vos clients peuvent maintenant saisir leurs données de carte dans ces champs.
| Propriété | Description / Action |
|---|---|
| sessionData |
Obligatoire Objet contenant toutes les données nécessaires à l’initialisation des Hosted Fields. Le SDK JavaScript extrait automatiquement tous les détails de session nécessaires. |
| logLevel | Contrôle le niveau de verbosité des logs du SDK JavaScript (DEBUG, INFO, WARN, ERROR). |
| language | Définit la langue des messages d’erreur. Remplace la locale définie dans sessionData. |
| mode | À définir sur "development" pour un logging plus détaillé. |
| style |
Définit les règles CSS appliquées à l’intérieur des instances de champs <iframe>. Ces styles s’appliquent à l’intérieur de l’<iframe> et n’interfèrent pas avec les CSS globales de votre site. Pour en savoir plus sur la personnalisation, reportez-vous au chapitre dédié. |
| fields cardNumber cardholderName cardBrands expiryDate csc |
Obligatoire Les champs individuels de saisie des données de carte, chacun dans une instance <iframe> séparée.
|
| additionalInput cardholder |
Transmettez le nom du porteur de carte à notre plateforme au lieu d'afficher l' <iframe> correspondante sur votre page de paiement. |
Gestionnaires d’événements
Les éléments <iframe> écoutent les événements / interactions utilisateur suivants sur chaque champ de données de carte :
| Événement / interaction | Description |
|---|---|
| field-ready |
Le champ a été initialisé. |
| all-fields-ready |
Tous les champs du <form> ont été initialisés. |
| error-init-fields |
Dépassement de délai (timeout) lors de l’initialisation des champs. |
| card-brand-selected |
Lorsque le porteur de carte modifie le schéma de paiement d’une carte co-badgées. |
| card-brand-entry |
Lorsque le numéro de carte saisi permet de déterminer les marques disponibles, y compris pour les cartes co-badgées. |
| focus |
Le champ a le focus. |
| blur |
Le champ perd le focus. |
| empty |
Le champ prend ou perd le focus et est vide ou devient vide pendant la saisie. |
| valid |
Les données saisies sont valides pendant la saisie. |
| invalid |
Les données saisies sont invalides pendant la saisie. |
| error |
Notre plateforme renvoie une erreur. |
| validityChange |
Tous les champs comportent une saisie valide. Émis uniquement par l’objet hostedFields. |
Structure des données d’événement
L’objet événement transmis à vos gestionnaires contient les informations suivantes :
| Type d’événement | Description |
|---|---|
| focus blur empty valid invalid field-ready |
|
| invalid |
|
| all-fields-ready |
|
| card-brand-selected |
|
| card-brand-entry |
|
| error |
|
Raisons d’invalidité
| Raison | Description |
|---|---|
| BAD_FORMAT |
Le contenu du champ ne respecte pas le format attendu. |
| BAD_LUHN |
Le numéro de carte échoue à la validation de la clé de Luhn. |
| NO_BRANDS |
Impossible de déterminer la marque / le schéma de paiement de la carte. |
| YEAR_TOO_FAR |
L’année de la date d’expiration est trop éloignée dans le futur (plus de 15 ans). |
| YEAR_TOO_OLD |
La date d’expiration est déjà passée. |
| TOO_SHORT |
Le contenu du champ est trop court. |
| TOO_LONG |
Le contenu du champ est trop long. |
Soumettre et tokeniser les données de carte
Vos clients saisissent leurs coordonnées de carte dans les champs <input> de l’élément <form>. Notre plateforme détecte automatiquement le schéma de paiement dès que vos clients commencent à taper le numéro de carte. Cela fonctionne également pour les cartes co-badgées (le cas échéant). Pour chaque marque détectée, notre plateforme affiche le(s) logo(s) correspondant(s) dans <div id="cardBrands"></div>. Tous les logos sont cliquables, ce qui permet à vos clients de choisir leur marque préférée.
Une fois que tous les champs de données de carte contiennent des valeurs valides, vous pouvez activer le bouton <button> dans l’élément <form>, afin de permettre à vos clients de confirmer le paiement.
Vos clients soumettent les données de carte à notre plateforme via l’élément <button>, ce qui déclenche le gestionnaire d’événement que vous avez ajouté à cet élément lors de l’initialisation des Hosted Fields. Notre plateforme tokenise alors les données de carte et renvoie un hostedFieldsSessionId :
document.getElementById('paymentform').addEventListener('submit', (event) =>
{
	e.preventDefault();
	hostedFields.tokenize(true).then(()=> {

 const handleSubmit = async (onSuccess, onError) => {
    if (!hostedFieldsInstance) return;
    setIsSubmitting(true);
    setError(null);
    hostedFieldsInstance.tokenize(true).then(() => {
      console.log("Tokenize succeed");
      //Create Payment S2S using apiResponse.hostedFieldSesssionId
    }).catch(err => console.error("Error"))
  }

	console.log("Card Token:", token);
	}).catch(console.error);
});
Envoyer la requête CreatePayment
Vous envoyez une requête CreatePayment à notre plateforme via notre Server-to-server mode d'intégration. Remplacez les données de carte par le hostedFieldsSessionId, en incluant les propriétés 3-D Secure obligatoires :
CreatePaymentRequest request = new CreatePaymentRequest()
    .withHostedFieldsSessionId(hostedFieldsSessionId)     // Use the hostedFieldsSessionId created using the CreateHostedFieldsSession endpoint
    .withCardPaymentMethodSpecificInput(new CardPaymentMethodSpecificInput()
        .withReturnUrl("https://yourReturnUrl.com")
        .withThreeDSecure(new ThreeDSecure()
            .withSkipAuthentication(false)
            .withRedirectionData(new RedirectionData()
                .withReturnUrl("https://yourReturnUrl.com"))))
    .withOrder(new Order()
        .withAmountOfMoney(new AmountOfMoney()
            .withAmount(1000L)
            .withCurrencyCode("EUR"))
        .withCustomer(new Customer()
            .withDevice(new CustomerDevice()
                .withAcceptHeader("text/html,application/xhtml+xml,application/xml;q=0.9,image/avif,image/webp,*/*;q=0.8")
                .withBrowserData(new BrowserData()
                    .withColorDepth(99)
                    .withJavaEnabled(true)
                    .withJavaScriptEnabled(true)
                    .withScreenHeight("768")
                    .withScreenWidth("1024"))
                .withIpAddress("123.123.123.123")
                .withLocale("en_GB")
                .withUserAgent("Mozilla/5.0(WindowsNT10.0;Win64;x64)AppleWebKit/537.36(KHTML,likeGecko)Chrome/75.0.3770.142Safari/537.36")
                .withTimezoneOffsetUtcMinutes("-180"))));

// Create Payment using the hostedFieldsSessionId
CreatePaymentResponse response = client
    .merchant("YourPSPID")
    .payments()
    .createPayment(request);

// Retrieve the Transaction Result
String id = response.getPayment().getId();
String status = response.getPayment().getStatus();
CreatePaymentRequest request = new CreatePaymentRequest
{
HostedFieldsSessionId = hostedFieldsSessionId, // Use the hostedFieldsSessionId created using the CreateHostedFieldsSession endpoint
CardPaymentMethodSpecificInput = new CardPaymentMethodSpecificInput
{
ReturnUrl = "https://yourReturnUrl.com",
ThreeDSecure = new ThreeDSecure
{
SkipAuthentication = false,
RedirectionData = new RedirectionData
{
ReturnUrl = "https://yourReturnUrl.com"
}
}
},
Order = new Order
{
AmountOfMoney = new AmountOfMoney
{
Amount = 1000,
CurrencyCode = "EUR"
},
Customer = new Customer
{
Device = new CustomerDevice
{
AcceptHeader = "text/html,application/xhtml+xml,application/xml;q=0.9,image/avif,image/webp,*/*;q=0.8",
BrowserData = new BrowserData
{
ColorDepth = 99,
JavaEnabled = true,
JavaScriptEnabled = true,
ScreenHeight = "768",
ScreenWidth = "1024"
},
IpAddress = "123.123.123.123",
Locale = "en_GB",
UserAgent = "Mozilla/5.0(WindowsNT10.0;Win64;x64)AppleWebKit/537.36(KHTML,likeGecko)Chrome/75.0.3770.142Safari/537.36",
TimezoneOffsetUtcMinutes = "-180"
}
}
}
};
// Create Payment using the hostedFieldsSessionId
CreatePaymentResponse response = await client
.WithNewMerchant("YourPSPID")
.Payments
.CreatePayment(request);
// Retrieve the Transaction Result
string id = response.Payment.Id;
string status = response.Payment.Status;const createPaymentRequest = {
hostedFieldsSessionId: hostedFieldsSessionId, // Use the hostedFieldsSessionId created using the CreateHostedFieldsSession endpoint
cardPaymentMethodSpecificInput: {
returnUrl: "https://yourReturnUrl.com",
threeDsSecure: {
skipAuthentication: false,
redirectionData: {
returnUrl: "https://yourReturnUrl.com"
}
}
},
order: {
amountOfMoney: {
amount: 1000,
currencyCode: "EUR"
},
customer: {
device: {
acceptHeader: "text/html,application/xhtml+xml,application/xml;q=0.9,image/avif,image/webp,*/*;q=0.8",
browserData: {
colorDepth: 99,
javaEnabled: true,
javaScriptEnabled: true,
screenHeight: "768",
screenWidth: "1024"
},
ipAddress: "123.123.123.123",
locale: "en_GB",
userAgent: "Mozilla/5.0(WindowsNT10.0;Win64;x64)AppleWebKit/537.36(KHTML,likeGecko)Chrome/75.0.3770.142Safari/537.36",
timezoneOffsetUtcMinutes: "-180"
}
}
}
};
// Create Payment using the hostedFieldsSessionId
const createPaymentResponse = await client.payments.createPayment(
"YourPSPID",
createPaymentRequest,
null
);
// Retrieve the Transaction Result
string id = createPaymentResponse.payment.id;
string status = createPaymentResponse.payment.status;$createPaymentRequest = new CreatePaymentRequest();
$cardPaymentMethodSpecificInput = new CardPaymentMethodSpecificInput();
$threeDsSecure = new ThreeDSecure();
$redirectionData = new RedirectionData();
$redirectionData->setReturnUrl("https://yourReturnUrl.com");
$threeDsSecure->setSkipAuthentication(false);
$threeDsSecure->setRedirectionData($redirectionData);
$cardPaymentMethodSpecificInput->setReturnUrl("https://yourReturnUrl.com");
$cardPaymentMethodSpecificInput->setThreeDSecure($threeDsSecure);
$order = new Order();
$amountOfMoney = new AmountOfMoney();
$amountOfMoney->setAmount(1000);
$amountOfMoney->setCurrencyCode("EUR");
$customer = new Customer();
$device = new CustomerDevice();
$browserData = new BrowserData();
$browserData->setColorDepth(99);
$browserData->setJavaEnabled(true);
$browserData->setJavaScriptEnabled(true);
$browserData->setScreenHeight("768");
$browserData->setScreenWidth("1024");
$device->setAcceptHeader("text/html,application/xhtml+xml,application/xml;q=0.9,image/avif,image/webp,*/*;q=0.8");
$device->setBrowserData($browserData);
$device->setIpAddress("123.123.123.123");
$device->setLocale("en_GB");
$device->setUserAgent("Mozilla/5.0(WindowsNT10.0;Win64;x64)AppleWebKit/537.36(KHTML,likeGecko)Chrome/75.0.3770.142Safari/537.36");
$device->setTimezoneOffsetUtcMinutes("-180");
$order->setAmountOfMoney($amountOfMoney);
$order->setCustomer($customer);
$createPaymentRequest->setHostedFieldsSessionId($hostedFieldsSessionId); // Use the hostedFieldsSessionId created using the CreateHostedFieldsSession endpoint
$createPaymentRequest->setCardPaymentMethodSpecificInput($cardPaymentMethodSpecificInput);
$createPaymentRequest->setOrder($order);
// Create Payment using the hostedFieldsSessionId
$createPaymentResponse = $client->merchant("YourPSPID")->payments()->createPayment($createPaymentRequest);
// Retrieve the Transaction Result
$id = $createPaymentResponse->getPayment()->getId();
$status = $createPaymentResponse->getPayment()->getStatus();create_payment_request = CreatePaymentRequest()
card_payment_method_specific_input = CardPaymentMethodSpecificInput()
three_d_secure = ThreeDSecure()
redirection_data = RedirectionData()
redirection_data.return_url = "https://yourReturnUrl.com"
three_d_secure.skip_authentication = False
three_d_secure.redirection_data = redirection_data
card_payment_method_specific_input.return_url = "https://yourReturnUrl.com"
card_payment_method_specific_input.three_d_secure = three_d_secure
order = Order()
amount_of_money = AmountOfMoney()
amount_of_money.amount = 1000
amount_of_money.currency_code = "EUR"
customer = Customer()
device = CustomerDevice()
browser_data = BrowserData()
browser_data.color_depth = 99
browser_data.java_enabled = True
browser_data.java_script_enabled = True
browser_data.screen_height = "768"
browser_data.screen_width = "1024"
device.accept_header = "text/html,application/xhtml+xml,application/xml;q=0.9,image/avif,image/webp,*/*;q=0.8"
device.browser_data = browser_data
device.ip_address = "123.123.123.123"
device.locale = "en_GB"
device.user_agent = "Mozilla/5.0(WindowsNT10.0;Win64;x64)AppleWebKit/537.36(KHTML,likeGecko)Chrome/75.0.3770.142Safari/537.36"
device.timezone_offset_utc_minutes = "-180"
customer.device = device
order.amount_of_money = amount_of_money
order.customer = customer
create_payment_request.hosted_fields_session_id = hosted_fields_session_id # Use the hosted_fields_session_id created using the CreateHostedFieldsSession endpoint
create_payment_request.card_payment_method_specific_input = card_payment_method_specific_input
create_payment_request.order = order
# Create Payment using the hosted_fields_session_id
create_payment_response = client.merchant("YourPSPID").payments().create_payment(create_payment_request)
# Retrieve the Transaction Result
id = create_payment_response.payment.id
status = create_payment_response.payment.statuscreate_payment_request = OnlinePayments::SDK::Domain::CreatePaymentRequest.new
card_payment_method_specific_input = OnlinePayments::SDK::Domain::CardPaymentMethodSpecificInput.new
three_d_secure = OnlinePayments::SDK::Domain::ThreeDSecure.new
redirection_data = OnlinePayments::SDK::Domain::RedirectionData.new
redirection_data.return_url = "https://yourReturnUrl.com"
three_d_secure.skip_authentication = false
three_d_secure.redirection_data = redirection_data
card_payment_method_specific_input.return_url = "https://yourReturnUrl.com"
card_payment_method_specific_input.three_d_secure = three_d_secure
order = OnlinePayments::SDK::Domain::Order.new
amount_of_money = OnlinePayments::SDK::Domain::AmountOfMoney.new
amount_of_money.amount = 1000
amount_of_money.currency_code = "EUR"
customer = OnlinePayments::SDK::Domain::Customer.new
device = OnlinePayments::SDK::Domain::CustomerDevice.new
browser_data = OnlinePayments::SDK::Domain::BrowserData.new
browser_data.color_depth = 99
browser_data.java_enabled = true
browser_data.java_script_enabled = true
browser_data.screen_height = "768"
browser_data.screen_width = "1024"
device.accept_header = "text/html,application/xhtml+xml,application/xml;q=0.9,image/avif,image/webp,*/*;q=0.8"
device.browser_data = browser_data
device.ip_address = "123.123.123.123"
device.locale = "en_GB"
device.user_agent = "Mozilla/5.0(WindowsNT10.0;Win64;x64)AppleWebKit/537.36(KHTML,likeGecko)Chrome/75.0.3770.142Safari/537.36"
device.timezone_offset_utc_minutes = "-180"
customer.device = device
order.amount_of_money = amount_of_money
order.customer = customer
create_payment_request.hosted_fields_session_id = hosted_fields_session_id # Use the hosted_fields_session_id created using the CreateHostedFieldsSession endpoint
create_payment_request.card_payment_method_specific_input = card_payment_method_specific_input
create_payment_request.order = order
# Create Payment using the hosted_fields_session_id
create_payment_response = client.merchant("YourPSPID").payments.create_payment(create_payment_request)
# Retrieve the Transaction Result
id = create_payment_response.payment.id
status = create_payment_response.payment.statusTraiter la réponse de la plateforme
Notre plateforme envoie une réponse contenant un objet merchantAction.
Elle vous indique comment procéder avec le paiement. Selon la réponse, ces scénarios sont possibles :
- Cinématique d'authentification frictionless ou passive 3-D Secure : (merchantAction.actionType=null) : Vos clients utilisent une carte inscrite au 3-D Secure. Les propriétés 3-D Secure dans votre requête CreatePayment s'avèrent suffisantes pour l'étape d'authentification. Nous soumettons la transaction à l'acquéreur et fournissons le résultat dans la propriété statusOutput.statusCode.
- cinématique d'authentification forte 3-D Secure : (merchantAction.actionType="REDIRECT") : Vos clients utilisent une carte inscrite au 3-D Secure. Ils doivent s'identifier en tant que détenteur légitime de la carte. Redirigez-les vers leur émetteur via le merchantAction.redirectData.redirectURL. Définissez une cardPaymentMethodSpecificInput.returnUrl dans la requête CreatePayment initiale pour vous assurer que vos clients sont redirigés vers votre boutique en ligne par la suite.
- Pas d'authentification 3-D Secure (merchantAction.actionType=null) : Vos clients utilisent une carte non inscrite au 3-D Secure. Nous soumettons la transaction à l'acquéreur et fournissons le résultat dans la propriété statusOutput.statusCode.
Obtenir & afficher le résultat de la transaction
Êtes-vous en train de migrer de l'ancien système vers GoPay ?
Contrairement à l'ancien système, notre plateforme n'envoie pas de notifications par e-mail pour les commandes GoPay traitées ou les mises à jour de statut.
Utilisez les webhooks pour recevoir des notifications sur les mises à jour de statut des transactions. En fonction du résultat, implémentez un mécanisme sur votre serveur pour envoyer des e-mails à votre/vos clients. Cela vous permettra de personnaliser le contenu, le moment et de sélectionner les mises à jour de statut pour lesquelles vous souhaitez envoyer des e-mails.
En savoir plus sur la migration des fonctionnalités héritées vers GoPay dans notre guide dédié.
Selon le scénario, l'obtention et l'affichage du résultat de la transaction / 3-D Secure diffère :
Cinématique Frictionless/Pas d'authentification 3-D Secure
Vos clients restent sur votre boutique en ligne. Adaptez la page de paiement de votre boutique en ligne selon le statusOutput.statusCode tel que retourné par la requête initiale CreatePayment.
Cinématique Challenge
Nous recevons le résultat de la transaction / 3-D Secure et redirigeons vos clients vers votre boutique en ligne. Définissez un cardPaymentMethodSpecificInput.returnUrl dans la requête initiale CreatePayment pour cette redirection. Assurez-vous d'implémenter un mécanisme sur ce returnUrl qui notifie votre serveur de cette redirection. Dès réception de cette notification, envoyez une requête GetPaymentDetails pour obtenir le résultat de la transaction. Utilisez le payment.id de la requête initiale CreatePayment :
Adaptez le returnUrl en fonction du statusOutput.statusCode tel que retourné par cette requête GetPaymentDetails.
Découvrez dans notre guide des statuts plus d'informations sur les propriétés de la réponse, leur signification et comment procéder de manière appropriée en fonction du statut des transactions.
Vous pouvez également recevoir le résultat de la transaction / 3-D Secure via les webhooks. Notez que les webhooks sont des événements asynchrones. Par conséquent, ils ne conviennent pas pour gérer des événements en temps réel pendant le processus de paiement.
Cinématiques (flows)
Retrouvez ci‑dessous une cinématique de transaction complète impliquant chaque partie et les étapes (éventuellement) optionnelles :
- Vos clients se rendent sur votre page de checkout et finalisent leur achat.
- Vous envoyez une requête de session CreateHostedFields à notre plateforme. Notre plateforme renvoie les propriétés sdkUrl / hostedFieldsSessionId.
- Vous chargez la bibliothèque sdkUrl pour initialiser les Hosted Fields dans les champs input de votre page de checkout.
- Vos clients saisissent leurs données de carte dans les champs input et soumettent les données de carte à notre plateforme.
- Notre plateforme tokenise les données de carte.
- Vous envoyez une requête CreatePayment à notre plateforme en utilisant notre Server-to-server mode d’intégration, en incluant les propriétés 3-D Secure obligatoires.
6' (optionnel) : nous effectuons un contrôle de prévention de la fraude. - Notre plateforme renvoie une réponse contenant un objet merchantAction qui vous indique comment poursuivre. Les scénarios suivants sont possibles :
a) Cinématique d’authentification 3-D Secure frictionless (merchantAction.actionType = null). La cinématique reprend à l’étape 13).
b) Cinématique d’authentification forte 3-D Secure (merchantAction.actionType = "REDIRECT"). La cinématique reprend à l’étape 8).
c) Pas d’authentification 3-D Secure (merchantAction.actionType = null). La cinématique reprend à l’étape 13). - Vous redirigez le client vers sa banque émettrice pour l’authentification 3-D Secure. Le client s’identifie.
- Notre plateforme reçoit le résultat de l’authentification 3-D Secure de la part de l’émetteur. En fonction du résultat, deux scénarios sont possibles :
a) Si l’identification a échoué, nous redirigeons vos clients vers votre returnUrl, ce qui met fin à la cinématique. Vous récupérez / affichez le résultat de la transaction comme décrit à l’étape 12.
b) Si l’identification a réussi, la cinématique reprend à l’étape 10. - Nous traitons la transaction et recevons le résultat de l’acquéreur / banque acquéreuse.
- Nous redirigeons votre client vers votre returnUrl.
- Vous interrogez notre plateforme pour obtenir le résultat de la transaction et l’affichez sur votre returnUrl / dans votre boutique en ligne.
- Si la transaction est réussie, vous pouvez livrer les biens / services.
Personnalisation
La solution Hosted Fields vous offre un maximum de possibilités de personnalisation, afin de l’intégrer de manière fluide dans votre page de checkout. Ces styles s’appliquent à l’intérieur de l’iframe et n’interfèrent pas avec les CSS globales de votre site.
Le contenu à l’intérieur des instances <iframe> intégrées est réduit au minimum, tandis que tous les autres éléments (par ex. bordures, libellés, mise en page générale) sont gérés par les CSS de votre site.
Personnalisez l’instance <iframe> intégrée lors de l’initialisation des Hosted Fields via la variable var config :
{
 	"style": {
 		"input": {
 			"color": "#000000",
 			"font-family": "courier, monospace",
 			"font-size": "14px"
 	},
 	"input::placeholder": {
 		"color": "#999999"
 		}
 	}
}
Sélecteurs et propriétés CSS autorisés
Pour des raisons de sécurité, notre plateforme n’autorise que les sélecteurs et propriétés CSS suivants. Ces styles s’appliquent à l’intérieur des instances <iframe> et n’interfèrent pas avec les CSS globales de votre site.
| Sélecteurs | Propriétés CSS |
|---|---|
| input input:valid input:invalid select select:valid select:invalid select:disabled input::placeholder :valid :invalid :disabled ::placeholder |
background-color border border-radius caret-color color font-family font-size font-style font-variant font-weight letter-spacing line-height margin padding text-decoration |
Classes CSS
Les instances <iframe> implémentent les classes CSS suivantes, ce qui vous permet d’adapter leur style en fonction de leur état courant :
| Classe | Description |
|---|---|
| sdpx-field-focus | Le champ courant est focalisé. |
| sdpx-field-empty | Le champ courant perd le focus et est vide. |
| sdpx-field-valid | Le champ courant respecte les règles de validation en vigueur lors de la saisie. |
| sdpx-field-invalid | Le champ courant ne respecte pas les règles de validation en vigueur lors de la saisie. |
| sdpx-field-ready | Le champ courant est prêt à accepter la saisie. |
Possibilités supplémentaires
Notre solution Hosted Fields offre de nombreuses autres possibilités. Découvrez ici toutes ses fonctionnalités disponibles.
Utiliser un token existant
Notre plateforme vous permet de stocker de manière permanente les données de carte de crédit de vos clients pour les paiements 1‑clic. En pré‑remplissant les Hosted Fields avec les données stockées (un token, c’est‑à‑dire un identifiant unique représentant la carte), l’expérience de paiement de vos clients sera encore plus fluide et vous améliorerez votre taux de conversion. Vous devez créer chaque token lors d'une transaction préalablement initiée par le client (CIT) dans le cadre du dispositif COF (compte enregistré (Account on file)). Reportez-vous à notre guide dédié au dispositif COF pour plus d’informations et à notre guide des cas d’usage COF pour savoir comment traiter ce type de transactions.
Comme le token existe déjà au moment de la demande de transaction, la cinématique de paiement est différente :
- Indiquez à notre plateforme que vous souhaitez utiliser un token existant. Pour ce faire, modifiez la requête CreateHostedFields en ajoutant la propriété tokens: Chaque élément du tableau tokens représente un profil de carte que vous envisagez d'utiliser dans les étapes suivantes.
List tokens = new ArrayList<>();
tokens.add("token1");
tokens.add("token2");

CreateHostedFieldsSessionRequest request = new CreateHostedFieldsSessionRequest()
    .withLocale("en-US")
    .withTokens(tokens);

// Create HostedFields Session
CreateHostedFieldsSessionResponse response = client
    .merchant("YourPSPID")
    .hostedFields()
    .createHostedFieldsSession(request);

// Remove the invalid tokens from tokens
List validTokens = tokens.stream()
    .filter(token -> !response.getInvalidTokens().contains(token))
    .collect(Collectors.toList());
IList tokens = ["token1", "token2"];
CreateHostedFieldsSessionRequest request = new CreateHostedFieldsSessionRequest
{
Locale = "en-US",
Tokens = tokens
};
// Create HostedFields Session
CreateHostedFieldsSessionResponse response = await client
.WithNewMerchant("YourPSPID")
.HostedFields
.CreateHostedFieldsSession(request);
// Remove the invalid tokens from tokens
IList validTokens = [..tokens.Where(token => !response.InvalidTokens.Contains(token))]; const tokens = ["token1", "token2"];
const request = {
locale: "en-US",
tokens: tokens
};
// Create HostedFields Session
const response = await client.hostedFields.createHostedFieldsSession(
"YourPSPID",
request,
null);
// Remove the invalid tokens from tokens
const validTokens = tokens.filter(token => !response.invalidTokens.includes(token));$tokens = ["token1", "token2"];
com.dotcms.rendering.velocity.viewtools.VelocityRequestWrapper@c67cba7 = new CreateHostedFieldsSessionRequest();
$request->setLocale("en-US");
$request->setTokens($tokens);
// Create HostedFields Session
org.tuckey.web.filters.urlrewrite.UrlRewriteWrappedResponse@627cbc82 = $client->merchant("YourPSPID")->hostedFields()->createHostedFieldsSession(com.dotcms.rendering.velocity.viewtools.VelocityRequestWrapper@c67cba7);
// Remove the invalid tokens from tokens
$validTokens = array_values(array_filter($tokens, fn($token) => !in_array($token, $response->getInvalidTokens(), true)));tokens = ["token1", "token2"]
request = CreateHostedFieldsSessionRequest()
request.locale = "en-US"
request.tokens = tokens
# Create HostedFields Session
response = self.client.merchant(MERCHANT_ID).hosted_fields().create_hosted_fields_session(request)
# Remove the invalid tokens from tokens
valid_tokens = [token for token in tokens if token not in response.invalid_tokens]tokens = %w[token1 token2]
request = OnlinePayments::SDK::Domain::CreateHostedFieldsSessionRequest.new
request.locale = "en-US"
request.tokens = tokens
# Create HostedFields Session
response = @client.merchant("YourPSPID").hosted_fields.create_hosted_fields_session(request)
# Remove the invalid tokens from tokens
valid_tokens = tokens.reject- Dans notre réponse, notre plateforme renvoie une liste de tokens invalides (response.invalidTokens). Supprimez les tokens invalides du tableau de tokens.
- Récupérer le PAN masqué et la marque du schéma de paiement pour chaque instance de tokens restante à partir de la base de données de vos clients.
3'(optionnel). Si vous n’avez pas stocké ces données, envoyez une requête GetToken pour chaque instance de tokens à notre plateforme. Notre plateforme renvoie le PAN et la marque du schéma de paiement dans les propriétés card.data.cardWithoutCvv.cardNumber / card.data.cardScheme. - Affichez les détails de la carte pour chaque instance de tokens sur votre page de paiement afin que vos clients puissent sélectionner leur profil de carte préféré.
- Initialisez le Hosted Fields sur votre page de paiement. Les champs de saisie des données de carte restent vides.
- Vos clients sélectionnent le profil de carte défini dans l’instance tokens correspondante.
- Appelez la fonction useToken() depuis la bibliothèque JavaScript Hosted Fields. Utilisez l’instance tokens choisie comme argument de la fonction :
hostedFields.useToken(existingTokenId); - Les champs de saisie des données de la carte sont remplis avec les données de tokens, à l'exception du champ <input> CVV.
8'(optionnel). Vos clients utilisent une nouvelle carte non présente dans tokens. Appelez sdpx.clearToken() pour réinitialiser les champs de saisie de la carte sans supprimer le token. - Vos clients saisissent le cryptogramme visuel (CVV) (lorsqu’ils sélectionnent un token existant) ou de nouvelles données de carte (pour toute nouvelle carte) afin de compléter les données de carte requises. Assurez-vous de recevoir l'événement valid pour tous les champs de saisie des données de la carte.
- Vos clients envoient les données de la carte à notre plateforme via l'élément <button>, déclenchant le gestionnaire d'événement que vous avez ajouté à l'élément <button> lors de l'initialisation des Hosted Fields. Notre plateforme tokenizse les données de la carte et renvoie un hostedFieldsSessionId.
- Vous envoyez une requête CreatePayment à notre plateforme via notre mode d'intégration Server-to-server. Remplacez les détails de la carte par le hostedFieldsSessionId, y compris les propriétés 3-D Secure obligatoires. Pour augmenter les chances d'une cinématique d'authentification frictionless ou passive, ajoutez un maximum de propriétés recommandées/facultatives à votre requête.
- Vous envoyez une requête GetHostedFieldsSession à notre plateforme pour récupérer soit l'instance de tokens, soit le nouveau token qui a été utilisé pour traiter le paiement.
Récupérer un token à partir d'anciennes sessions Hosted Fields
Votre plateforme vous permet de récupérer le token de paiement utilisé dans une session Hosted Fields. ela peut être particulièrement utile pour les cinématiques de paiement utilisant des tokens existants. Envoyez une requête GetHostedFieldsSession pour identifier le token qui a réellement été utilisé pour le paiement.
Pour ce faire, envoyez une requête à notre endpoint dédié GetHostedFieldsSession.
| Property | Description |
|---|---|
| {merchantId} |
Votre compte sur notre plateforme via lequel la session Hosted Fields initiale a été traitée. |
| {sessionId} |
L'identifiant hostedFieldsSessionId pendant lequel le token a été utilisé. |
La réponse de notre plateforme contient diverses propriétés fournissant des informations sur le sessionId :
| Property | Description |
|---|---|
| sessionId |
L'identifiant hostedFieldsSessionId de votre requête GetHostedFieldsSession. |
| token tokenId expiryDate maskedPan isTemporary |
tokenId: L'identifiant unique du token utilisé dans ce sessionId. expiryDate: La date d'expiration de la carte tokenisée. maskedPan: Le numéro de carte masqué associé à ce token. isTemporary: Indique si le token est temporaire ou permanent.
|
En raison de SCA, vos clients pourraient tout de même devoir entrer leur CVV et/ou passer une vérification d'authentification 3-D Secure. Notre formulaire de paiement affiche les champs obligatoires à remplir automatiquement.
Une session Hosted Fields étant valable pendant deux heures, veillez à envoyer votre requête GetHostedFieldsSession dans ce délai.
Gérer le nom du titulaire de la carte
Notre API vous permet de transmettre vous-même le nom du porteur de carte à notre plateforme, de sorte que vous n'avez pas besoin d'afficher l'<iframe> correspondante sur votre page de paiement. Ajoutez la propriété additionalInput.cardholder à const config avec la valeur souhaitée lors de l'initialisation des Hosted Fields sur votre page de paiement.
Notez que les propriétés additionalInput.cardholder et fields.cardholderName sont mutuellement exclusives. Veillez donc à :
- n'en ajouter qu'une seule à const config.
or - initialiser additionalInput.cardholder avec une chaîne vide si vous ajoutez également fields.cardholderName.
Déclaration d’accessibilité
Worldline s’engage à rendre ses solutions accessibles selon la directive (UE) 2019/882 du 17 avril 2019 relative aux exigences en matière d’accessibilité applicables aux produits et services (EAA) ainsi qu’à l’article 47 de la loi française n°2005-102 du 11 février 2005.
Lisez notre déclaration complète sur l'accessibilité pour la solution Hosted Fields afin de connaître la portée de la conformité du produit.