Proximis
Einführung
Our Proximis plug-in comes with regular updates and full integration support, offering a versatile out-of-the-box solution to accept online payments easily.
Supported integration & payment methods
Wix supports the following integration methods on our platform:
Hosted Checkout Page
Redirect your customers from your checkout page to our platform for entering sensitive payment data.
Hosted tokenization page
Include an iFrame payment form hosted on our save environment in your checkout page for entering sensitive payment data.
Find the complete list of payment methods the plugin supports in our payment methods overview.
Reach out to our Product Team to get the plugin! We will contact the Proximis Team to grant you access.
Make sure to provide us with :
- The name of your enterprise.
- Your Sales representative within Worldline.
- The name of your integrator, should you work with one.
Plugin code modifications void technical support
For security and stability, Worldline does not support plugins whose code has been modified by the merchant or a third party. Plugins are provided as-is (official version). Any unauthorised modification voids support and warranty and may cause malfunctions, security gaps, or incompatibilities with PSP updates.
Plugin installieren
Create account
Install plugin
The first step to use the plugin is the installation process. Before you proceed, make sure your infrastructure meets these system requirements:
|
Item |
Description |
|---|---|
|
Plugin package |
Get access to our plugin? |
|
Direct credentials |
|
|
Unified Commerce (Proximis) |
Compatible with Proximis version 6.17 |
|
PHP |
PHP version 8.3+ |
|
PCI compliancy |
SAQ A |
Our module is hosted on a third-party composer repository. Once the access will be granted, follow the below steps:
-
Add the repository of the module in your composer.json file:
"repositories": [
{
  "type": "composer",
  "url": "https://nexus-production.tools-services-1.omn.proximis.com/repository/cleverage-ingenicodirect"
}
...
We strongly advise to install the solution on a dev or staging server. This will ensure the plugin works correctly for your instance before moving it to production.
-
Require the module via composer:
Composer require cleverage/ingenicodirectOR directly add the dependency in the composer.json file of the project:
"require": { "cleverage/ingenicodirect": "1.6.*" ... } -
Install the plugin:
php bin/change.phar proximis:plugins compile
php bin/change.phar proximis:plugins enable Cleverage_Ingenico
php bin/change.phar proximis:plugins install-application Cleverage_Ingenico
php bin/change.phar proximis:plugins install-services Cleverage_Ingenico
Configure plugin
After the installation, you need to configure the plugin to link your store to our platform.
Payment connector creation
First create and configure a payment connector. To do this, follow these steps:
-
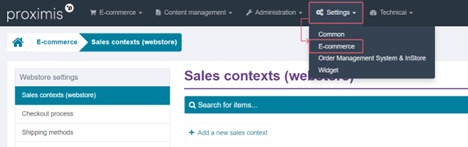
Login to the Proximis Back Office. Go to Settings > E-commerce.
-
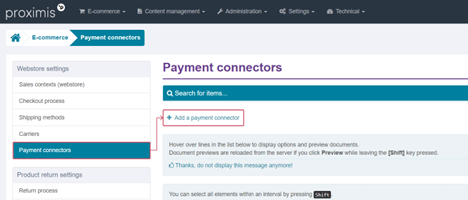
Go to Webstore settings > Payment connectors Click on the button Add a payment connector.
-
Configure the following settings in Generic Properties:
Item
Description
Title
Visible by the end consumer, only labelled in the administrative interface
Code
Identify the connector into the code
Description
Can contain formatted text, images and links
Visual
Display an image next to the title
Application criteria
Define rules that will condition the connector display
Payment instructions
Can contain formatted text, images and links
-
Configure the following settings in Technical properties. Select the connector type "Payment connector Worldline Online Payments".
Information about the payment connector
|
Property |
Description/Actions |
|---|---|
|
Logging level |
Level of logs sent to the IngenicoDirectLogger logging service
|
Connector parameters
|
Property |
Description/Actions |
|---|---|
|
Merchant ID/PSPID |
Enter your test/live PSPID from our platform that you want to use for transaction processing. |
|
Mode |
|
|
Integration method |
|
|
Mode de capture |
|
Payment methods differ in their support of the available capture / integration methods. Refer to the documentation for further details.
Several connectors can coexist on the site.
API configuration
|
Property |
Description/Actions |
|---|---|
|
API key |
Enter the API Key of your test/live PSPID. Read our dedicated guide to learn how to generate one. |
|
Secret API |
Enter the API Secret of your test/live PSPID. Read our dedicated guide to learn how to generate one. |
|
Use a custom API base URL |
Enables API base URL overloading |
|
Custom API base URL |
Overloads the URL used for API calls |
When a connector is created, you can edit these fields directly.
Once the document has been saved for the first time, the data will be hidden and access to editing will be via the "Activate modification" button.
Webhook configuration
Property |
Description/Actions |
|---|---|
Webhook key |
Enter the webhooks Key of your test/live PSPID from the Merchant Portal as described in our dedicated guide. |
Secret Webhook |
Enter the webhooks Secret of your test/live PSPID from the Merchant Portal as described in our dedicated guide. |
Contact Url |
This URL will be added to the list of target URLs in the Merchant Portal. |
When a connector is created, you can edit these fields directly.
Once the document has been saved for the first time, the data will be hidden and access to editing will be via the "Activate modification" button.
Hosted Checkout Page
|
Property |
Description/Actions |
|---|---|
|
Means of payment |
Automatic generation of means of payment is only available once the API key, API secret and PSPID have been added. Leave empty to display all payment methods active in your account. |
|
Combining card payment methods |
Define whether to group all cards payment methods under one single button on the Hosted Checkout Page. |
Each payment method can be edited to customize the display of payment methods registered on the customer's account (block list of registered cards).
Do not modify fields
Payment method
Worldline Online Payments
in automatically generated documents.
Integrated payment form (Hosted Tokenization)
Property |
Description/Actions |
|---|---|
Hide cardholder name |
Hide the card holder name on the iframe. |
Hide known fields |
When paying from a card registered on the customer's account, displays only the CVV field (and the other fields required by the form). |
Display customer consent in the integrated payment form |
Displays the consent checkbox in the Worldline iFrame (yes) or in the Proximis template (no). |
*displayed only if Enable 1-Click payments is set to Yes.
Generic configuration
Property |
Description/Actions |
|---|---|
Model file name |
Enter the file name of your template to adapt the "Integrated payment form (Hosted Tokenization)" to the look and feel of your shop. To learn how to create templates, see our dedicated chapter in Hosted Tokenization Page guide. |
Enable 1-Click payments |
Enables card registration in the customer account and payment from a registered card. |
Customer notifications
Property |
Description/Actions |
|---|---|
Notification of transaction in progress |
Send an email when the transaction is being processed. |
Successful transaction notification |
Send an email for successful transactions. |
Failed transaction notification |
Send an email for declined transactions. |
Processed refund notification |
Send an email for refunds. |
Automatic refunds
Property |
Description/Actions |
|---|---|
Enable automatic refunds for transactions processed by this connector |
|
Typology used for processing |
The automatic redemption process will only process redemptions with this typology |
Number of refunds to be processed per run |
|
Number of attempts |
|
Recipient of error report |
|
Error report language |
The error report e-mail (cleverage_ingenicodirect_automatic_refund_error)must have a translated and active version in the desired language. |
*Displayed only if Enable automatic reimbursement for transactions carried out by this connector is set to Yes.
Automatic refunds
General
Automatic reimbursements allow you to trigger reimbursement processes automatically via jobs.
To activate them, follow these steps:
- Go to the Proximis Back Office and select payment connector configuration.
- Configure the option Activate automatic reimbursement for transactions carried out by this connector to Yes.
Each connector will process its own reimbursements.
A transaction performed by another connector of the same type will not be processed if the connector is not configured to automatically process refunds.
All new refunds created from the moment automatic refunds are activated and transacted via this connector will be processed in the automatic refund process.
Please note: However, refunds created before automatic refunds are activated will not be added to the process, so you will have to process them yourself in Finance Management.
If you want to stop automatic refunds, simply reset the option to Non and all refunds that have been added to the process and not yet processed will have to be processed manually.
In the Finance Management Back Office, when you consult a reimbursement you can find out the information involved in its automatic processing by consulting its chronology.
Three statuses concern automatic repayments:
- Refund set for automatic process
- Automatic reimbursement created
- Automatic refund process completed
Each of these statuses has "Success" or "Failure" information to indicate whether the process went well or not.
Process options
In the payment connector configuration you can also set the "Maximum number of attempts at a refund" and the "Number of refunds per job".
The number of attempts will indicate how many times a refund should try to be processed automatically if any errors occur in its process; if it ever reaches the limit of attempts the refund will have to be processed manually. The default limit is 3.
The number of refunds per job can be used to limit the number of refunds that need to be processed at once, to prevent the job from running too long or reaching its memory limit. The default limit is 50.
Error report
You can also choose to receive an e-mail as soon as the automatic processing of a refund encounters an error. To do this, enter an e-mail address in the payment connector configuration "Error report recipient".
The content of the e-mail can be configured in the Back Office, to do so:
- Go to "Administration > Notifications":
- Select "E-mails" section:
- Then look for the l "Error during automatic refund" e-mail with the Synchronization code cleverage_ingenicodirect_automatic_refund_error and Edit it.
Several substitution values are available, and you can add them to the e-mail content to get more details on the refund concerned and the error encountered.
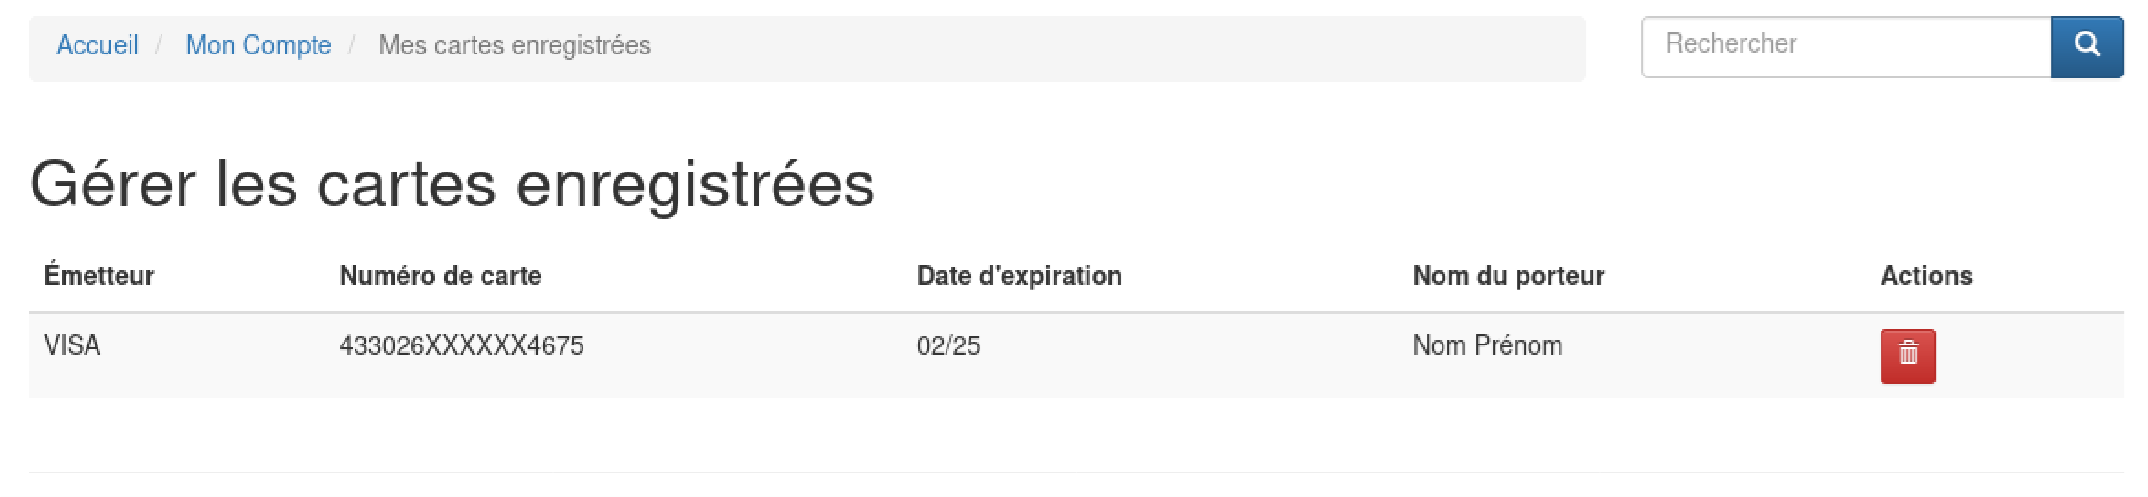
Saved Cards
A block listing the cards registered during a payment with 1-Click activated is available with the module
- The block allows the customer to list and delete registered cards.
- The block can be customized in the same way as a native Proximis block (extension, alternative template, etc.).
The issuer's name and visuals can be customized via the Means of payment documents (Title data on site(s) and Visuals).
Release notes & Test cases
Release notes
Keep an eye on our Release Notes to stay informed about updates and new features (i.e. payment methods, features, integration methods) we have added to this plugin!
Perform test transactions
Use our platform's test environment to make sure your plugin works as intended. We offer test data sets on our dedicated Test cases page. Target our test environment as described in chapter "Configure plugin".
Make sure to switch to the LIVE environment as soon as you have finalised your tests.