Migrate to Hosted Tokenization Page
Important notice
Our legacy integration methods, payment methods and features will remain available until December 31st 2025.
Intro
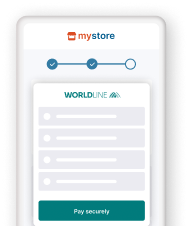
The Hosted Tokenization Page is the enhanced Direct version of the legacy FlexCheckout. It provides you the highest level of customisation possible and is compliant with the choice of brand in co-badging .
- Delegate handling sensitive data to us for PCI compliancy
- Flexible and easy visual adaptation & customization
- Ease future purchases and Card On File payments
The Hosted Tokenization Page does not accept Bancontact card numbers.
However, the Hosted Tokenization Page will detect co-badged Bancontact cards.
In these cases, the Hosted Tokenization Page accepts the card payment brand linked to the co‑badged Bancontact card.
Learn in our dedicated "Co-badging and BIN detection" guide how to combine co-badging with the Hosted Tokenization Page.
Learn in our dedicated Bancontact guide how to process transactions with stand-alone Bancontact cards.
Make the move
Thanks to the Direct REST API's and our platform's features, migrating from the legacy Flexcheckout to the Direct Hosted Tokenization Page is easy.
Use this checklist to let us guide you through the whole migration process:
- Configure your test account
- Get familiar with the Hosted Tokenization Page
- Understand similarities and differences Hosted Tokenization Page - FlexCheckout
- Set up/Create a test account
- Choose the way you want to implement Direct
- Modify the target endpoint URL and your checkout page
- Configure your test account
- Adapt the Hosted Tokenization Page
- Make sure to receive our platform’s transaction feedback
- Test your new integration
Configure your test account
Direct reduces your efforts by outsourcing most of the Back Office technical settings to the Direct API. However, you need to make some basic configurations in your account:
- Configure your API Key/API Secret to set up the Direct authentication mechanism. Read our dedicated guide to learn how to do this.
- Configure your Webhooks Key/Webhooks Secret to receive feedback for processed transactions. Read our dedicated guide to learn how to do this.
Check out our comprehensive guide to learn about how your existing account settings translate to the Direct API.
Get familiar with the Hosted Tokenization Page
Get familiar with the Hosted Tokenization Page, the payment flow and its Direct-specific features.
View Hosted Tokenization Page
Understand similarities and differences Hosted Tokenization Page - FlexCheckout
The Hosted Tokenization Page implements the same features like FlexCheckout:
- Your customers stay on your checkout page to enter PCI-relevant card details.
- They enter the card data in an <iframe>-embedded form hosted by our server.
- Our platform tokenises the card data. We return a (temporary) token you can use for initialising the actual payment.
- Using this token, you request the actual payment via a second dedicated integration method. Server-to-server replaces DirectLink for this step.
However, there are some differences to consider when migrating:
| Item | Hosted Tokenization Page | FlexCheckout |
|---|---|---|
|
<iframe> |
Invoking the initialize() function from this Javascript code adds the <iframe> to your checkout page. |
You add the <iframe> to your checkout page using your own code. |
|
<iframe> |
Invoking the initialize() function from this Javascript code opens the target URL automatically when adding the <iframe>. |
You open the target URL when adding the <iframe> on your checkout page. |
|
Card data submission button |
Not part of the <iframe> itself. You need to add it directly to your checkout page. Despite this, our API explorer still allows you to simulate the full payment flow. Learn how it works in the dedicated chapter in our Hosted Tokenization Page. When clicked, the button should trigger the submitTokenization() function from the JavaScript code. This function submits the card data to our platform. |
Part of the <iframe> itself. |
|
Getting the token |
When invoking the submitForm() function from this Javascript code, we return the token as a return value. |
Via a GET parameter to a URL you have defined when initialising the <iframe>. |
|
Getting the transaction result |
Via a GetPaymentDetails request or webhooks. Learn more in the dedicated chapter. |
Via DirectQuery request or Hosted Payment Page feedback channels. |
Set up/Create a test account
You can keep using your existing PREPROD (test) account to get started. To activate Direct in your PREPROD (test) account, follow these steps:
- Log in to the PREPROD (test) Back Office.
- Go to Configuration > Account > Your options.
- In "Available options", look for "DIR (Merchant using Direct integration)" and click on "Activate".
If you cannot find "DIR (Merchant using Direct integration)", then it is activated by default. Look in the "Default options" to confirm.
Choose the way you want to implement Direct
1Use our plugins
The ideal short cut: Install one of our plugins you can use in parallel with your existing version. Jump right to the respective guide to get it up and running!
Modify the target endpoint URL and your checkout page
Modify the target endpoint URL and the data you need to send to our platform to get the tokenization URL. Make also sure to add this HTML elements/Javascript code to your checkout page.
The legacy parameters translate to Direct properties in JSON format in your CreateHostedTokenization/CreatePayment request. To help you re-create your legacy integration for the new platform, use this legacy parameter Direct properties mapping.
Configure your test account
Direct reduces your efforts by outsourcing most of the Back Office technical settings to the CreatePaymentAPI. However, you need to make some basic configurations in your account:
- Configure your API Key/API Secret to set up the Direct authentication mechanism. Read our dedicated guide to learn how to do this.
- Configure your Webhooks Key/Webhooks Secret to receive feedback for processed transactions. Read our dedicated guide to learn how to do this.
Check out our comprehensive guide to learn about how your existing account settings translate to the Direct API.
Adapt the Hosted Tokenization Page
Adapt the Hosted Tokenization Page to the look and feel of your webshop and smooth out the payment flow even further by
- Using the various advanced customisation tools.
- Uploading a fully customised template or an adapted version of our GitHub repository.
Make sure to receive our platform’s transaction feedback
Make sure your webshop infrastructure receives and processes our platform's transaction feedback according to the payment.id logic.
Direct offers webhooks and endpoint GetPaymentDetails to get all information you need to follow-up on your orders.
To enhance transparency, Direct implements three properties to represent a transaction status:
- status
- statusCategory
- statusCode
For a quick manual check, look up the transactions status in the Merchant Portal. Read the dedicated chapter in our Merchant Portal guide to learn how to do this.
Check out our comprehensive Status guide for all possible return values, including a mapping of classic parameter STATUS to the aforementioned properties.
Test your new integration
Use our Test cases to trigger specific scenarios for any given payment method. Our API Explorer allows you to build and test countless scenarios with just a few clicks!
When testing, mind that
- The test data / settings in the legacy Worldline Back Office (Configuration > Technical Information > Test Info) are irrelevant for Direct.
- The data in our Test cases ONLY work for payment requests in our test environment. Using this data in our production environment will lead to undesirable testing results.
Go live
Are you ready to go live?
Use your existing live account – no need to create a new one! But make sure to
- Modify the target endpoint URL (as explained in step 5)
- Configure your API Key/API Secret and your Webhooks Key/Webhooks Secret (as explained in step 8)
- Transfer your legacy Back Office settings to the Merchant Portal or outsource them to the Direct API
You're all set, now what? Start enjoying all the advantages of Direct!
- Effective fraud prevention modules.
- Manifold advanced features.
- Best practices guide lines.