Hosted Fields
This product is in pilot mode. Contact us to become a pilot.
- Delegate handling sensitive data to us for PCI compliancy
- Max out visual adaptation & customisation
- Ease future purchases and Card On File payments for your customers!
Get started
To process transactions on our platform with this solution, make sure that
- You have an account on our platform
- At least one of the following payment methods is activated in the Merchant Portal via Business > Payment methods:
American ExpressCartes BancairesDankortDinersJCBMaestroMasterCardUPI - UnionPay InternationalVisaAre you using the Back Office?
You can check the payment method’s activation status via Configuration > PM activation. - You have configured your API Key and API Secret in your account
- Your server can process server-to-server request via our RESTful API.
Are you all set? Then learn how to use our Hosted Fields in the next chapter!
How it works
Before you process live transactions, use our test environment. Get to know our solution without costs or any commitments involved! Once you want to go live, check out here how to get a production account or contact us!
To qualify for SAQ-A for this integration method, you need to comply with the eligibility criteria. Refer to the PCI Security Standards Council’s library for a full overview.
The Hosted Fields works only in conjunction with the Server-to-server integration method which is an indispensable step in the payment flow. Consequentially, this requires you to include at least the mandatory 3-D Secure properties in your payment request.
Target most up-to-date API base URL
We encourage you to always target the most up-to-date API base URL when sending requests to our platform. Have a look at our dedicated guide for a full overview.
To allow you a smooth transition, previous API base URLs remain available until further notice.
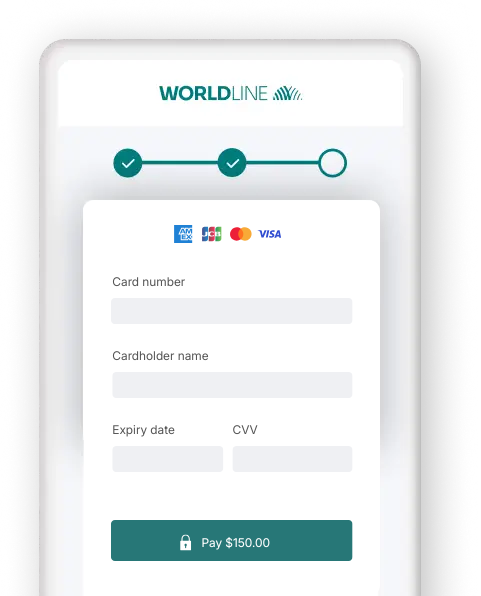
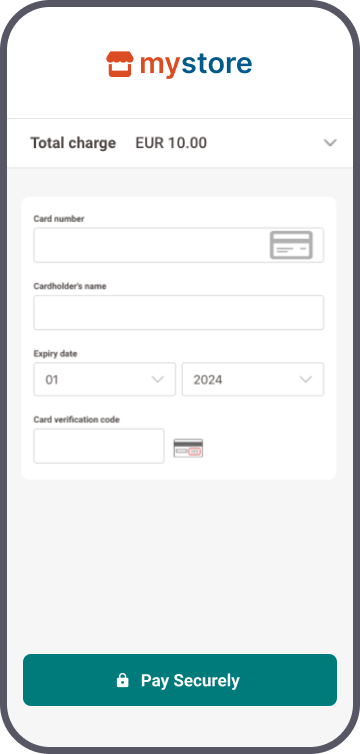
Differences Hosted Fields vs Hosted Tokenization Page
Both the Hosted Fields and the Hosted Tokenization Page solutions rely on the same principle: Outsourcing sensitive data to <iframe> instances hosted by us, allowing you to keep a low PCI compliancy type.
However, they have some distinctive differences. Have a look at them to understand how each solution works:
| Element | Hosted Fields | Hosted Tokenization Page |
|---|---|---|
| Characteristics of the <iframe> instances | Each sensitive field is a separate <iframe>. | The whole payment form is inside a single <iframe>. |
| Each <div>/<iframe> can be placed individually on the checkout page. | The <iframe> is one unbreakable element to be merged with the checkout page. | |
| The <iframe> can be customised via CSS, no template necessary. | Can be customised as a whole via an uploaded template. | |
| Each <div>/<iframe> has its own event handler, providing detailed information for all possible scenarios. | The <iframe> has one event handler for all its fields, providing only basic information of the payment form’s global status. | |
| Worldline JavaScript library |
Must be retrieved for each Hosted Fields session. Must be soft-coded in your checkout page front-end. |
Identical Url for reach request. Can be hard-coded in your checkout page front-end. |
Integration steps
Your customers have to provide their credit card number at one point during their journey in your webshop. As a merchant, the greatest challenge is to link all steps during this journey into one seamless experience. At the same time, you need to ensure the safe transfer of your customers' data to the financial institutions handling the data.
Therefore, you can either:
- Outsource the necessary security precautions completely (by using our Hosted Checkout Page solution). However, this method has limits: Your customers will notice a redirection to an external URL - a noticeable break in the payment flow.
- Collect the sensitive data on your own (by using our Server-to-server solution). But this requires you to fulfil the highest PCI requirements - which involves a lot of effort.
- Implement the Hosted Tokenization Page on your checkout page to find a middle ground between Hosted Checkout Page and Server-to-server integration methods. However, although offering flexibility, its <iframe> can only be customized as whole.
Our Hosted Fields solution elevates the Hosted Tokenization Page to the next level: Instead of adding/customising the whole payment form to your checkout page, add and customise card data fields individually:
- Let us handle the credit card data without your customers noticing. Just add individual
<iframe>instances to your webshop's checkout page, splitting up the payment form at will. As we are the host for all<iframe>instances, the sensitive data come and stay at our end! We exchange the actual payment card number for ahostedFieldsSessionIdwhich is not in scope for PCI. - Use this
hostedFieldsSessionIdfor the actual payment request via the Server-to-server integration method. - Merge the
<iframe>instances seamlessly with into your webshop's look and feel. Adapt your webshop's checkout page completely at will!
Our Hosted Fields solution works with all card payment methods.
The following chapters cover a high-level overview of a typical flow. It describes all the steps you need to follow for processing Hosted Checkout Page transactions. Find a detailed overview including optional steps, 3-D Secure authentication etc. in the dedicated chapter.
- Build checkout page
- Initialise your system
- Create HostedFields session
- Load JavaScript library to checkout page
- Initialise Hosted Fields on checkout page
- Submit and tokenise card data
- Send CreatePayment request
- Process platform response
- Get & show transaction result
Build checkout page
Our Hosted Fields solution requires your checkout page to implement specific HTML/JavaScript elements:
<script id="hosted-fields-sdk" crossorigin="anonymous"></script>

<form id="payment-form" novalidate>
 <div id="cardholderName"></div>
	 <div id="cardNumber"></div>
	 <div id="expiryDate"></div>
	 <div id="csc"></div>
	 <div id="cardBrands"></div>
<button id="submit-button" type="submit" disabled>Pay</button>
</form>


<script>

// Store our platform’s response to the CreateHostedSession request
var apiResponse;

document.addEventListener(‘DOMContentLoaded’, () => {

	const sdkScript = document.getElementById(‘hosted-fields-sdk’);
	sdkScript.src = apiResponse.sdkUrl;
	sdkScript.integrity = ‘sha256-${apiResponse.sdkSri}’;
	sdkScript.onload = () => initializeHostedFields(apiResponse);
});

function initializeHostedFields(apiResponse) {
	const submitButton = document.getElementById('submit-button');
	const resultDisplay = document.getElementById('result-display');
	const config = {
		"sessionData": apiResponse.sessionData,
		"logLevel": "debug",
		"style": {
			"input": {
			"color": "#000000",
			"font-family": "courier, monospace",
			"font-size": "14px"
			},
			"input::placeholder": {
				"color": "#999999"
				}
			},
		"fields": {
			"cardNumber": {
				"id": "cardNumber",
				"title": "Your card number",
				"placeholder": "0000 0000 0000 0000"
			},
			"cardholderName": {
				"id": "cardholderName",
				"title": "Your name",
				"placeholder": "John"
			},
			"cardBrands": {
				"id": "cardBrands",
				"title": "Your card brand",
				"placeholder": "VISA"
			},
			"expiryDate": {
				"id": "expiryDate",
				"caption": "Your card expiration date",
				"checkExpiredDate": "true",
				"placeholder": "MM/YY"
			},
			"csc": {
				"id": "csc",
				"title": "Your card security code",
				"caption": "Your card security code",
				"placeholder": "123"
			}
		},
		"additionalInput": {
		    "cardholder": ""
		    }
		}
	}

	const hostedFields = sdpx.hostedfields.create(config);

	// Add event listeners
	hostedFields.on("focus", evt => console.log(evt.fieldId + " Focused"));
	hostedFields.on("blur", evt => console.log(evt.fieldId + " Blurred"));
	hostedFields.on("empty", evt => console.log(evt.fieldId + " Empty"));
	hostedFields.on("valid", evt => console.log(evt.fieldId + " Valid"));
	hostedFields.on("invalid", evt => console.log(evt.fieldId + " Invalid"));
	hostedFields.on("field-ready", evt => console.log(evt.fieldId + " Field ready"));
	hostedFields.on("all-fields-ready", evt => console.log(evt.fieldId + " All fields ready"));
	hostedFields.on("error-init-fields", evt => console.log(evt.fieldId + " Error initiating fields"));
	hostedFields.on("card-brand-selected", evt => console.log(evt.fieldId + " Card brand selected"));
	hostedFields.on("card-brand-entry", evt => console.log(evt.fieldId + " Card brand entry"));
	hostedFields.on("error", evt => console.log(evt.fieldId + " error"));


	document.getElementById('payment-form').addEventListener('submit', (event) =>
	{
		const handleSubmit = async (onSuccess, onError) => {
		if (!hostedFieldsInstance) return;
		setIsSubmitting(true);
		setError(null);
		hostedFieldsInstance.tokenize(true).then(() => {
		console.log("Tokenize succeed");
		//CreatePayment via Server-to-server using apiResponse.hostedFieldSesssionId
		}).catch(err => console.error("Error"))
	}
	});
}
</script>
The individual elements fulfil a specific role during the payment flow:
| Element | Description |
|---|---|
|
This <form> element is the payment mask for entering card data on your checkout page. It contains individual <div> instances for each input field of the payment form. Upon initialising the Hosted Fields via the var config, an <iframe> is added in each <div> instance. Each <iframe> loads a page containing a single <input> field for entering card data. |
|
Load the Hosted Fields JavaScript library which is used for
As the value for src is different for each request, you need to dynamically/soft-code it. Mind that you need to load the script from our server rather than hosting it yourself. |
|
Stores our platform's response to your CreateHostedFields request. |
|
Load the Hosted Fields JavaScript library to your checkout page for tokenising the card data. |
|
Initialise the Hosted Fields (the
<div> instances within the <form> element), including their look and feel to merge them into your checkout page.
|
|
Tokenize the card data in the <form>. Set tokenize() to either true or false depending on the use case: If you set this property to true, make sure get your customers' consent to store/reuse their card data on our platform. |
Initialise your system
Initialise your system for sending requests to our GoPay API by
- Defining test/live endpoint URLs.
- Activating your test/live PSPID on our platform.
- Setting up a test/live API Key/Secret pair.
- Make sure to use the right endpoint and switch back to the live URL as soon as you have finished your tests.
- The data in our Test cases ONLY work for payment requests in our test environment. Using this data in our production environment will lead to undesirable testing results.
Create HostedFields session
Your web shop application's backend sends a CreateHostedFields request to our platform:
// Create a URI for our TEST/LIVE environment
final URI apiEndpoint = URI.create("https://payment.preprod.direct.worldline-solutions.com");
// Initialise the client with the apikey, apisecret and URI
final Authenticator authenticator = new V1HmacAuthenticator("YourAPIkey", "YourAPISecret");
final MetadataProvider metadataProvider = new DefaultMetadataProvider("OnlinePayments");
final DefaultConnection defaultConnection = new DefaultConnection(5000, 10000, 1000);
ClientInterface client = Factory.createClient(apiEndpoint, defaultConnection, authenticator, metadataProvider);
CreateHostedFieldsSessionRequest request = new CreateHostedFieldsSessionRequest()
.withLocale("en-US");
// Create HostedFields Session
CreateHostedFieldsSessionResponse response = client
.merchant("YourPSPID")
.hostedFields()
.createHostedFieldsSession(request);
// Retrieve the hostedFieldsSessionId
String hostedFieldsSessionId = response.getHostedFieldsSessionId();// Create a URI for our TEST/LIVE environment
Uri apiEndpoint = new Uri("https://payment.preprod.direct.worldline-solutions.com/");
// Initialise the client with the apikey, apisecret and URI
IClient client = Factory.CreateClient(new CommunicatorConfiguration()
{
ApiKeyId = "YourAPIkey",
SecretApiKey = "YourAPISecret",
Integrator = "YourCompanyName",
ApiEndpoint = apiEndpoint,
});
CreateHostedFieldsSessionRequest request = new CreateHostedFieldsSessionRequest
{
Locale = "en-US"
};
// Create HostedFields Session
CreateHostedFieldsSessionResponse response = await client
.WithNewMerchant("YourPSPID")
.HostedFields
.CreateHostedFieldsSession(request);
// Retrieve the hostedFieldsSessionId
string hostedFieldsSessionId = response.HostedFieldsSessionId;// Initialise the client with the apikey, apisecret and URI
const client = directSdk.init({
host: "payment.preprod.direct.worldline-solutions.com",
apiKeyId: "YourAPIkey",
secretApiKey: "YourAPISecret",
integrator: "OnlinePayments"
});
const createHostedFieldsSessionRequest = {
locale: "en-US"
};
// Create HostedFields Session
const createHostedFieldsSessionResponse = await client.hostedFields.createHostedFieldsSession(
"YourPSPID",
createHostedFieldsSessionRequest,
null
);
// Retrieve the hostedFieldsSessionId
string hostedFieldsSessionId = createHostedFieldsSessionResponse.hostedFieldsSessionId;// Create a CommunicatorConfiguration with the apiKey, apiSecret and apiEndpoint
$communicatorConfiguration = new CommunicatorConfiguration(
"YourAPIkey",
"YourAPISecret",
"https://payment.preprod.direct.worldline-solutions.com",
"YourCompanyName"
);
$authenticator = new V1HmacAuthenticator($communicatorConfiguration);
$communicator = new Communicator($communicatorConfiguration, $authenticator);
// Initiate a Client
$client = new Client($communicator);
$createHostedFieldsSessionRequest = new CreateHostedFieldsSessionRequest();
$createHostedFieldsSessionRequest->setLocale("en-US");
// Create HostedFields Session
$createHostedFieldsSessionResponse = $client->merchant("YourPSPID")->hostedFields()->createHostedFieldsSession($createHostedFieldsSessionRequest);
// Retrieve the hostedFieldsSessionId
$hostedFieldsSessionId = $createHostedFieldsSessionResponse->getHostedFieldsSessionId();# Create a CommunicatorConfiguration with the apiKey, apiSecret and apiEndpoint
communicator_configuration = CommunicatorConfiguration(
api_endpoint="https://payment.preprod.direct.worldline-solutions.com",
api_key_id="YourAPIkey",
secret_api_key="YourAPISecret",
authorization_type="v1HMAC",
integrator="YourCompanyName",
connect_timeout=5000,
socket_timeout=10000,
max_connections=10
)
communicator = Factory.create_communicator_from_configuration(communicator_configuration)
# Initiate a Client
client = Factory.create_client_from_communicator(communicator)
create_hosted_fields_session_request = CreateHostedFieldsSessionRequest()
create_hosted_fields_session_request.locale = "en-US"
# Create HostedFields Session
create_hosted_fields_session_response = client.merchant("YourPSPID").hosted_fields().create_hosted_fields_session(create_hosted_fields_session_request)
# Retrieve the hosted_fields_session_id
hosted_fields_session_id = create_hosted_fields_session_response.hosted_fields_session_id# Create a CommunicatorConfiguration with the apiKey, apiSecret and apiEndpoint
communication_configuration = OnlinePayments::SDK::CommunicatorConfiguration.new(
integrator: "OnlinePayments",
api_endpoint: "https://payment.preprod.direct.worldline-solutions.com",
api_key_id: "YourAPIKey",
secret_api_key: "YourAPISecret",
authorization_type: "v1HMAC",
connect_timeout: 5000,
socket_timeout: 10000,
max_connections: 10
)
# Initiate a Client
client = OnlinePayments::SDK::Factory.create_client_from_configuration(communication_configuration)
create_hosted_fields_session_request = OnlinePayments::SDK::Domain::CreateHostedFieldsSessionRequest.new
create_hosted_fields_session_request.locale = "en-US"
# Create HostedFields Session
create_hosted_fields_session_response = client.merchant("YourPSPID").hosted_fields.create_hosted_fields_session(create_hosted_fields_session_request)
# Retrieve the hosted_fields_session_id
hosted_fields_session_id = create_hosted_fields_session_response.hosted_fields_session_idIf you want to pre‑fill the Hosted Fields with stored card data for 1-click payments, make sure to include property tokens in your request.
Endpoint Urls in test / live
- Endpoint URL TEST: https://payment.preprod.direct.worldline-solutions.com/{merchantId}/hostedfields/sessions
- Endpoint URL LIVE: https://payment.direct.worldline-solutions.com/{merchantId}/hostedfields/sessions
Replace "{merchantId}" with your test/live account on our platform. Learn more about the "merchantId" in our glossary.
In our response, our platform will return the following data:
| Property | Description |
|---|---|
| sdkSri | The subresource integrity reference for the Javascript library (sdkUrl). Add it as HTML attribute integrity to the Hosted Fields JavaScript library. |
| sdkUrl |
The Hosted Fields JavaScript library for the subsequent steps in the payment flow. Load the library as a separate <script> element to the checkout page. This library is used for
|
| sessionData |
The sessionData object contains all necessary data for the subsequent steps. Do not access the object's properties. Always use the object itself to initialise the Hosted Fields session. |
Load JavaScript library to checkout page
Load the Hosted Fields JavaScript library you have received in the previous step via object sessionData.
Add apiResponse.sdkUrl as a separate <script> element to your checkout page containing the <form> element. For enhanced security, add apiResponse.sdrSri it as HTML attribute integrity.
The library is used in subsequent steps for
<script id="hosted-fields-sdk" src="..." integrity="sha384-..." crossorigin="anonymous"></script>
document.addEventListener('DOMContentLoaded', () => {

	const sdkScript = document.getElementById('hosted-fields-sdk');
	sdkScript.src = apiResponse.sdkUrl;
	sdkScript.integrity = 'sha256-${apiResponse.sdkSri}';

	sdkScript.onload = () => initializeHostedFields(apiResponse);
});As the value for src is different for each request, you need to dynamically/soft-code it. Mind that you need to load the script from our server rather than hosting it yourself.
Initialise Hosted Fields on checkout page
Prepare a configuration object config using the sessionData object and initialise hostedFields. Add event listeners to react to user interactions (i.e. display errors, update the user interface).
The <button> event handler enables users to submit card data to our platform for tokenisation for the subsequent step.
function initializeHostedFields(apiResponse) {
	const submitButton = document.getElementById('submit-button');
	const resultDisplay = document.getElementById('result-display');
	const config = {
		"sessionData": apiResponse.sessionData,
		"logLevel": "debug",
		"style": {
			"input": {
			"color": "#000000",
			"font-family": "courier, monospace",
			"font-size": "14px"
			},
			"input::placeholder": {
				"color": "#999999"
				}
			},
		"fields": {
			"cardNumber": {
				"id": "cardNumber",
				"title": "Your card number",
				"placeholder": "0000 0000 0000 0000"
			},
			"cardholderName": {
				"id": "cardholderName",
				"title": "Your name",
				"placeholder": "John"
			},
			"cardBrands": {
				"id": "cardBrands",
				"title": "Your card brand",
				"placeholder": "VISA"
			},
			"expiryDate": {
				"id": "expiryDate",
				"caption": "Your card expiration date",
				"checkExpiredDate": "true",
				"placeholder": "MM/YY"
			},
			"csc": {
				"id": "csc",
				"title": "Your card security code",
				"caption": "Your card security code",
				"placeholder": "123"
			}
		}
	}

	const hostedFields = sdpx.hostedfields.create(config);

	// Add event listeners
        hostedFields.on("focus", evt => console.log(evt.fieldId + " Focused"));
	hostedFields.on("blur", evt => console.log(evt.fieldId + " Blurred"));
	hostedFields.on("empty", evt => console.log(evt.fieldId + " Empty"));
	hostedFields.on("valid", evt => console.log(evt.fieldId + " Valid"));
	hostedFields.on("invalid", evt => console.log(evt.fieldId + " Invalid"));
	hostedFields.on("field-ready", evt => console.log(evt.fieldId + " Field ready"));
	hostedFields.on("all-fields-ready", evt => console.log(evt.fieldId + " All fields ready"));
	hostedFields.on("error-init-fields", evt => console.log(evt.fieldId + " Error initiating fields"));
	hostedFields.on("card-brand-selected", evt => console.log(evt.fieldId + " Card brand selected"));
	hostedFields.on("card-brand-entry", evt => console.log(evt.fieldId + " Card brand entry"));
	hostedFields.on("error", evt => console.log(evt.fieldId + " error"));

	document.getElementById('payment-form').addEventListener('submit', (event) =>
	{
	const handleSubmit = async (onSuccess, onError) => {
        if (!hostedFieldsInstance) return;
        setIsSubmitting(true);
        setError(null);
        hostedFieldsInstance.tokenize(true).then(() => {
      console.log("Tokenize succeed");
      //Create Payment S2S using apiResponse.hostedFieldSesssionId
    }).catch(err => console.error("Error"))
		}
	});
}
This will insert <iframe> instances into the <div> elements in the <form> element. Each <iframe> loads a page containing an individual <input> field for each card data field:
Card number
Card holder name
Card brands
Expiry date
CVV
Your customers can now enter their card data in the fields.
| Property | Description/Action |
|---|---|
| sessionData |
Mandatory The object containing all necessary data for initialising the Hosted Fields. The Javascript SDK extracts automatically all necessary sessions details. |
| logLevel | Controls the JavaScript SDK logging verbosity (DEBUG, INFO, WARN, ERROR). |
| language | Sets the locale for error messages. Overrides the locale from sessionData. |
| mode | Set to "development" for more verbose logging. |
| style |
Defines CSS rules applied inside the field <iframe> instances. These styles apply inside the <iframe> and do not interfere with your site's global CSS. Learn more about styling in the dedicated chapter. |
| fields cardNumber cardholderName cardBrands expiryDate csc |
Mandatory The individual card data input fields in separate <iframe> instances.
|
| additionalInput cardholder |
Pass the cardholder name to our platform instead of displaying the respective <iframe> on your checkout page. |
Event handlers
The <iframe> elements listen for the following events/user interactions on each card data field:
| Event/Interaction | Description |
|---|---|
| field-ready |
Field has been initialised. |
| all-fields-ready |
All fields belonging to the <form> have been initialised. |
| error-init-fields |
Field initialisation timeout. |
| card-brand-selected |
When the card holder changes the card brand of a co-badged card. |
| card-brand-entry |
When the entered card number allows determining available brands, including co-badged cards. |
| focus |
Input has focus. |
| blur |
Input loses focus. |
| empty |
Input takes or loses focus and is empty or becomes empty during entry. |
| valid |
Input data is valid during data entry. |
| invalid |
Input data is invalid during data entry. |
| error |
Our platform returns an error. |
| validityChange |
All fields have valid input. Thrown only by the object hostedFields. |
Event data structure
The event object passed to your event handlers contains the following information:
| Event type | Description |
|---|---|
| focus blur empty valid invalid field-ready |
|
| invalid |
|
| all-fields-ready |
|
| card-brand-selected |
|
| card-brand-entry |
|
| error |
|
Invalid event reasons
| Reason | Description |
|---|---|
| BAD_FORMAT |
Field content does not comply with the expected format. |
| BAD_LUHN |
Card number fails Luhn checksum validation. |
| NO_BRANDS |
Unable to determine card brand/scheme. |
| YEAR_TOO_FAR |
Expiry date year is too far in the future (more than 15 years). |
| YEAR_TOO_OLD |
Expiry date lies in the past. |
| TOO_SHORT |
Field content is too short. |
| TOO_LONG |
Field content is too long. |
Submit and tokenise card data
Your customers enter their card details in the <input> fields in the <form> element. Our platform detects the card scheme automatically once your customers start typing in the number. This also works for co-badged cards (where applicable). For every brand detected, our platform will display the respective logo(s) in <div id="cardBrands"></div>. All logos are clickable, allowing your customers to choose their preferred brand.
Once all card data fields have valid input, you can enable the <button> in the <form> element, allowing your customers to confirm the payment.
Your customers submit the card data to our platform via the <button> element, invoking the event listener you added to the <button> element when initialising the Hosted Fields. Our platform tokenises the card data and returns a hostedFieldsSessionId:
document.getElementById('paymentform').addEventListener('submit', (event) =>
{
	e.preventDefault();
	hostedFields.tokenize(true).then(()=> {

 const handleSubmit = async (onSuccess, onError) => {
    if (!hostedFieldsInstance) return;
    setIsSubmitting(true);
    setError(null);
    hostedFieldsInstance.tokenize(true).then(() => {
      console.log("Tokenize succeed");
      //Create Payment S2S using apiResponse.hostedFieldSesssionId
    }).catch(err => console.error("Error"))
  }

	console.log("Card Token:", token);
	}).catch(console.error);
});
Send CreatePayment request
You send a CreatePayment request to our platform via our Server-to-server integration method. Replace the card details with the hostedFieldsSessionId, including the mandatory 3-D Secure properties:
CreatePaymentRequest request = new CreatePaymentRequest()
    .withHostedFieldsSessionId(hostedFieldsSessionId)     // Use the hostedFieldsSessionId created using the CreateHostedFieldsSession endpoint
    .withCardPaymentMethodSpecificInput(new CardPaymentMethodSpecificInput()
        .withReturnUrl("https://yourReturnUrl.com")
        .withThreeDSecure(new ThreeDSecure()
            .withSkipAuthentication(false)
            .withRedirectionData(new RedirectionData()
                .withReturnUrl("https://yourReturnUrl.com"))))
    .withOrder(new Order()
        .withAmountOfMoney(new AmountOfMoney()
            .withAmount(1000L)
            .withCurrencyCode("EUR"))
        .withCustomer(new Customer()
            .withDevice(new CustomerDevice()
                .withAcceptHeader("text/html,application/xhtml+xml,application/xml;q=0.9,image/avif,image/webp,*/*;q=0.8")
                .withBrowserData(new BrowserData()
                    .withColorDepth(99)
                    .withJavaEnabled(true)
                    .withJavaScriptEnabled(true)
                    .withScreenHeight("768")
                    .withScreenWidth("1024"))
                .withIpAddress("123.123.123.123")
                .withLocale("en_GB")
                .withUserAgent("Mozilla/5.0(WindowsNT10.0;Win64;x64)AppleWebKit/537.36(KHTML,likeGecko)Chrome/75.0.3770.142Safari/537.36")
                .withTimezoneOffsetUtcMinutes("-180"))));

// Create Payment using the hostedFieldsSessionId
CreatePaymentResponse response = client
    .merchant("YourPSPID")
    .payments()
    .createPayment(request);

// Retrieve the Transaction Result
String id = response.getPayment().getId();
String status = response.getPayment().getStatus();
CreatePaymentRequest request = new CreatePaymentRequest
{
HostedFieldsSessionId = hostedFieldsSessionId, // Use the hostedFieldsSessionId created using the CreateHostedFieldsSession endpoint
CardPaymentMethodSpecificInput = new CardPaymentMethodSpecificInput
{
ReturnUrl = "https://yourReturnUrl.com",
ThreeDSecure = new ThreeDSecure
{
SkipAuthentication = false,
RedirectionData = new RedirectionData
{
ReturnUrl = "https://yourReturnUrl.com"
}
}
},
Order = new Order
{
AmountOfMoney = new AmountOfMoney
{
Amount = 1000,
CurrencyCode = "EUR"
},
Customer = new Customer
{
Device = new CustomerDevice
{
AcceptHeader = "text/html,application/xhtml+xml,application/xml;q=0.9,image/avif,image/webp,*/*;q=0.8",
BrowserData = new BrowserData
{
ColorDepth = 99,
JavaEnabled = true,
JavaScriptEnabled = true,
ScreenHeight = "768",
ScreenWidth = "1024"
},
IpAddress = "123.123.123.123",
Locale = "en_GB",
UserAgent = "Mozilla/5.0(WindowsNT10.0;Win64;x64)AppleWebKit/537.36(KHTML,likeGecko)Chrome/75.0.3770.142Safari/537.36",
TimezoneOffsetUtcMinutes = "-180"
}
}
}
};
// Create Payment using the hostedFieldsSessionId
CreatePaymentResponse response = await client
.WithNewMerchant("YourPSPID")
.Payments
.CreatePayment(request);
// Retrieve the Transaction Result
string id = response.Payment.Id;
string status = response.Payment.Status;const createPaymentRequest = {
hostedFieldsSessionId: hostedFieldsSessionId, // Use the hostedFieldsSessionId created using the CreateHostedFieldsSession endpoint
cardPaymentMethodSpecificInput: {
returnUrl: "https://yourReturnUrl.com",
threeDsSecure: {
skipAuthentication: false,
redirectionData: {
returnUrl: "https://yourReturnUrl.com"
}
}
},
order: {
amountOfMoney: {
amount: 1000,
currencyCode: "EUR"
},
customer: {
device: {
acceptHeader: "text/html,application/xhtml+xml,application/xml;q=0.9,image/avif,image/webp,*/*;q=0.8",
browserData: {
colorDepth: 99,
javaEnabled: true,
javaScriptEnabled: true,
screenHeight: "768",
screenWidth: "1024"
},
ipAddress: "123.123.123.123",
locale: "en_GB",
userAgent: "Mozilla/5.0(WindowsNT10.0;Win64;x64)AppleWebKit/537.36(KHTML,likeGecko)Chrome/75.0.3770.142Safari/537.36",
timezoneOffsetUtcMinutes: "-180"
}
}
}
};
// Create Payment using the hostedFieldsSessionId
const createPaymentResponse = await client.payments.createPayment(
"YourPSPID",
createPaymentRequest,
null
);
// Retrieve the Transaction Result
string id = createPaymentResponse.payment.id;
string status = createPaymentResponse.payment.status;$createPaymentRequest = new CreatePaymentRequest();
$cardPaymentMethodSpecificInput = new CardPaymentMethodSpecificInput();
$threeDsSecure = new ThreeDSecure();
$redirectionData = new RedirectionData();
$redirectionData->setReturnUrl("https://yourReturnUrl.com");
$threeDsSecure->setSkipAuthentication(false);
$threeDsSecure->setRedirectionData($redirectionData);
$cardPaymentMethodSpecificInput->setReturnUrl("https://yourReturnUrl.com");
$cardPaymentMethodSpecificInput->setThreeDSecure($threeDsSecure);
$order = new Order();
$amountOfMoney = new AmountOfMoney();
$amountOfMoney->setAmount(1000);
$amountOfMoney->setCurrencyCode("EUR");
$customer = new Customer();
$device = new CustomerDevice();
$browserData = new BrowserData();
$browserData->setColorDepth(99);
$browserData->setJavaEnabled(true);
$browserData->setJavaScriptEnabled(true);
$browserData->setScreenHeight("768");
$browserData->setScreenWidth("1024");
$device->setAcceptHeader("text/html,application/xhtml+xml,application/xml;q=0.9,image/avif,image/webp,*/*;q=0.8");
$device->setBrowserData($browserData);
$device->setIpAddress("123.123.123.123");
$device->setLocale("en_GB");
$device->setUserAgent("Mozilla/5.0(WindowsNT10.0;Win64;x64)AppleWebKit/537.36(KHTML,likeGecko)Chrome/75.0.3770.142Safari/537.36");
$device->setTimezoneOffsetUtcMinutes("-180");
$order->setAmountOfMoney($amountOfMoney);
$order->setCustomer($customer);
$createPaymentRequest->setHostedFieldsSessionId($hostedFieldsSessionId); // Use the hostedFieldsSessionId created using the CreateHostedFieldsSession endpoint
$createPaymentRequest->setCardPaymentMethodSpecificInput($cardPaymentMethodSpecificInput);
$createPaymentRequest->setOrder($order);
// Create Payment using the hostedFieldsSessionId
$createPaymentResponse = $client->merchant("YourPSPID")->payments()->createPayment($createPaymentRequest);
// Retrieve the Transaction Result
$id = $createPaymentResponse->getPayment()->getId();
$status = $createPaymentResponse->getPayment()->getStatus();create_payment_request = CreatePaymentRequest()
card_payment_method_specific_input = CardPaymentMethodSpecificInput()
three_d_secure = ThreeDSecure()
redirection_data = RedirectionData()
redirection_data.return_url = "https://yourReturnUrl.com"
three_d_secure.skip_authentication = False
three_d_secure.redirection_data = redirection_data
card_payment_method_specific_input.return_url = "https://yourReturnUrl.com"
card_payment_method_specific_input.three_d_secure = three_d_secure
order = Order()
amount_of_money = AmountOfMoney()
amount_of_money.amount = 1000
amount_of_money.currency_code = "EUR"
customer = Customer()
device = CustomerDevice()
browser_data = BrowserData()
browser_data.color_depth = 99
browser_data.java_enabled = True
browser_data.java_script_enabled = True
browser_data.screen_height = "768"
browser_data.screen_width = "1024"
device.accept_header = "text/html,application/xhtml+xml,application/xml;q=0.9,image/avif,image/webp,*/*;q=0.8"
device.browser_data = browser_data
device.ip_address = "123.123.123.123"
device.locale = "en_GB"
device.user_agent = "Mozilla/5.0(WindowsNT10.0;Win64;x64)AppleWebKit/537.36(KHTML,likeGecko)Chrome/75.0.3770.142Safari/537.36"
device.timezone_offset_utc_minutes = "-180"
customer.device = device
order.amount_of_money = amount_of_money
order.customer = customer
create_payment_request.hosted_fields_session_id = hosted_fields_session_id # Use the hosted_fields_session_id created using the CreateHostedFieldsSession endpoint
create_payment_request.card_payment_method_specific_input = card_payment_method_specific_input
create_payment_request.order = order
# Create Payment using the hosted_fields_session_id
create_payment_response = client.merchant("YourPSPID").payments().create_payment(create_payment_request)
# Retrieve the Transaction Result
id = create_payment_response.payment.id
status = create_payment_response.payment.statuscreate_payment_request = OnlinePayments::SDK::Domain::CreatePaymentRequest.new
card_payment_method_specific_input = OnlinePayments::SDK::Domain::CardPaymentMethodSpecificInput.new
three_d_secure = OnlinePayments::SDK::Domain::ThreeDSecure.new
redirection_data = OnlinePayments::SDK::Domain::RedirectionData.new
redirection_data.return_url = "https://yourReturnUrl.com"
three_d_secure.skip_authentication = false
three_d_secure.redirection_data = redirection_data
card_payment_method_specific_input.return_url = "https://yourReturnUrl.com"
card_payment_method_specific_input.three_d_secure = three_d_secure
order = OnlinePayments::SDK::Domain::Order.new
amount_of_money = OnlinePayments::SDK::Domain::AmountOfMoney.new
amount_of_money.amount = 1000
amount_of_money.currency_code = "EUR"
customer = OnlinePayments::SDK::Domain::Customer.new
device = OnlinePayments::SDK::Domain::CustomerDevice.new
browser_data = OnlinePayments::SDK::Domain::BrowserData.new
browser_data.color_depth = 99
browser_data.java_enabled = true
browser_data.java_script_enabled = true
browser_data.screen_height = "768"
browser_data.screen_width = "1024"
device.accept_header = "text/html,application/xhtml+xml,application/xml;q=0.9,image/avif,image/webp,*/*;q=0.8"
device.browser_data = browser_data
device.ip_address = "123.123.123.123"
device.locale = "en_GB"
device.user_agent = "Mozilla/5.0(WindowsNT10.0;Win64;x64)AppleWebKit/537.36(KHTML,likeGecko)Chrome/75.0.3770.142Safari/537.36"
device.timezone_offset_utc_minutes = "-180"
customer.device = device
order.amount_of_money = amount_of_money
order.customer = customer
create_payment_request.hosted_fields_session_id = hosted_fields_session_id # Use the hosted_fields_session_id created using the CreateHostedFieldsSession endpoint
create_payment_request.card_payment_method_specific_input = card_payment_method_specific_input
create_payment_request.order = order
# Create Payment using the hosted_fields_session_id
create_payment_response = client.merchant("YourPSPID").payments.create_payment(create_payment_request)
# Retrieve the Transaction Result
id = create_payment_response.payment.id
status = create_payment_response.payment.statusProcess platform response
Our platform sends a response containing a merchantAction object.
It instructs you how to proceed with the payment. Based on the response, these scenarios are possible:
- 3-D Secure frictionless flow: (merchantAction.actionType=null): Your customers use a 3-D Secure enrolled card. The 3-D Secure properties in your CreatePayment request prove to be sufficient for the authentication step. We submit the transaction to the acquirer and provide the result in property statusOutput.statusCode.
- 3-D Secure challenge flow: (merchantAction.actionType="REDIRECT"): Your customers use a 3-D Secure enrolled card. They need to identify themselves as the rightful card owner. Redirect them to their issuer via the merchantAction.redirectData.redirectURL. Define a cardPaymentMethodSpecificInput.returnUrl in the initial CreatePayment request to make sure your customers are redirected to your webshop afterwards.
- No 3-D Secure authentication (merchantAction.actionType=null): Your customers use a non-3-D Secure enrolled card. We submit the transaction to the acquirer and provide the result in property statusOutput.statusCode.
Get & show transaction result
Are you migrating from legacy to GoPay?
Unlike legacy, our platform does not send e-Mail notifications for processed GoPay orders or status updates.
Use Webhooks to receive notifications about transactions status updates. Based on the result, implement a mechanism in your server to send e-Mails to your/your customers' inbox. This will allow you to customise the content, timing and selecting the status updates for which you want to send e-Mails.
Learn more about migrating legacy features to GoPay in our dedicated guide.
Depending on the scenario, getting and showing the transaction / 3-D Secure result differs:
3-D Secure frictionless flow/No 3-D Secure authentication
Your customers remain in your webshop. Adapt your webshop checkout page according to the statusOutput.statusCode as returned from the initial CreatePayment request.
3-D Secure challenge flow:
We receive the transaction / 3-D Secure result redirect your customers to your webshop. Define a cardPaymentMethodSpecificInput.returnUrl in the initial CreatePayment request for this redirection. Make sure to implement a mechanism on this returnUrl that notifies your server about this redirection. Upon receiving this notification, send a GetPaymentDetails request to get the transaction result. Use the payment.id from the initial CreatePayment request:
Adapt the returnUrl depending on the statusOutput.statusCode as returned from this GetPaymentDetails request.
Learn in our dedicated Status guide more about the properties from the response, their meaning and how to proceed appropriately depending on the transactions' status.
You can also receive the transaction / 3-D Secure result via webhooks. Mind that webhooks are asynchronous events. Therefore, they are not suitable for handling real-time events for the checkout process.
Flows
Find a full transaction flow involving every party and (optional) steps in this overview:
- Your customers go to your check-out page and finalise the purchase.
- You send a CreateHostedFields session to our platform. Our platform returns the sdkUrl / hostedFieldsSessionId.
- You load the sdkUrl library to initialise the Hosted Fields in the input fields on your checkout page.
- Your customers enter their card details in the input fields and submit the card data to our platform.
- Our platform tokenises the card data.
- You send a CreatePayment request to our to our platform using our Server-to-server integration method, including the mandatory 3-D Secure properties.
6'(optional).We perform a fraud prevention check. - Our platform sends a response containing a merchantAction object, instructing you how to proceed. These scenarios are possible:
a) 3-D Secure frictionless flow (merchantAction.actionType=null). The flow continues at step 13).
b) 3-D Secure challenge flow (merchantAction.actionType="REDIRECT"). The flow continues at step 8).
c) No 3-D Secure authentication (merchantAction.actionType=null). The flow continues at step 13). - You redirect the customer to her/his issuing bank for 3-D Secure authentication. The customer identifies herself/himself.
- Our platform receives the 3-D Secure authentication result from the issuer. Based on the result, two scenarios are possible:
a) If the identification was unsuccessful, we redirect your customers to your returnUrl, ending the flow. You request/show the transaction result as described in step 12.
b) If the identification was successful, the flow continues at step 10. - We process the transaction and receive the result from the acquirer.
- We redirect your customer to your returnUrl.
- You request the transaction result from our platform and show it on your returnUrl/in your webshop.
- If the transaction was successful, you can deliver the goods/services.
Custom styling
The Hosted Fields solutions allows you a maximum of customisation, blending them seamlessly into your checkout page. These styles apply inside the iframe and do not interfere with your site's global CSS.
The content inside the embedded <iframe> instances is minimised whereas all other elements (i.e. borders, labels, overall layout) are managed by your website's CSS.
Customise the embedded <iframe> instance when initialising the Hosted Fields via the var config:
{
 	"style": {
 		"input": {
 			"color": "#000000",
 			"font-family": "courier, monospace",
 			"font-size": "14px"
 	},
 	"input::placeholder": {
 		"color": "#999999"
 		}
 	}
}
Authorised selectors and CSS properties
For security reasons, our platform only allows the following CSS selectors and properties. These styles apply inside the <iframe> instances and do not interfere with your site's global CSS.
| Selectors | CSS Properties |
|---|---|
| input input:valid input:invalid select select:valid select:invalid select:disabled input::placeholder :valid :invalid :disabled ::placeholder |
background-color border border-radius caret-color color font-family font-size font-style font-variant font-weight letter-spacing line-height margin padding text-decoration |
CSS classes
The <iframe> instances implement the following CSS classes, allowing you to adapt their styling to their current status:
| Class | Description |
|---|---|
| sdpx-field-focus | Current field becomes focused. |
| sdpx-field-empty | Current field loses focus and is empty. |
| sdpx-field-valid | Current field validates the semantic rules in place getting input. |
| sdpx-field-invalid | Current field does not validate the semantic rules in place when getting input. |
| sdpx-field-ready | Current field is ready for accepting input. |
Additional possibilities
Our Hosted Fields solution offers many more possibilities. Learn here all about its available features.
Use existing token
Our platform allows you to store your customers' credit card data permanently for 1‑click payments. By pre‑filling the Hosted Fields with the stored data (a so-called token), your customers' payment experience will become even smoother and improve your conversion rate. You must create each token during a prior customer-initiated transaction (CIT) under the COF framework. Refer to our dedicated COF framework guide for more information and COF use cases guide for instructions how to process such transactions.
As the token is already existing at the time of the transaction request, the payment flow is different:
- Instruct our platform you want to use an existing token. To do so, modify the CreateHostedFields request by adding the property tokens. Each element within the tokens array represents one card profile you intend to use in the subsequent steps.
List tokens = new ArrayList<>();
tokens.add("token1");
tokens.add("token2");

CreateHostedFieldsSessionRequest request = new CreateHostedFieldsSessionRequest()
    .withLocale("en-US")
    .withTokens(tokens);

// Create HostedFields Session
CreateHostedFieldsSessionResponse response = client
    .merchant("YourPSPID")
    .hostedFields()
    .createHostedFieldsSession(request);

// Remove the invalid tokens from tokens
List validTokens = tokens.stream()
    .filter(token -> !response.getInvalidTokens().contains(token))
    .collect(Collectors.toList());
IList tokens = ["token1", "token2"];
CreateHostedFieldsSessionRequest request = new CreateHostedFieldsSessionRequest
{
Locale = "en-US",
Tokens = tokens
};
// Create HostedFields Session
CreateHostedFieldsSessionResponse response = await client
.WithNewMerchant("YourPSPID")
.HostedFields
.CreateHostedFieldsSession(request);
// Remove the invalid tokens from tokens
IList validTokens = [..tokens.Where(token => !response.InvalidTokens.Contains(token))]; const tokens = ["token1", "token2"];
const request = {
locale: "en-US",
tokens: tokens
};
// Create HostedFields Session
const response = await client.hostedFields.createHostedFieldsSession(
"YourPSPID",
request,
null);
// Remove the invalid tokens from tokens
const validTokens = tokens.filter(token => !response.invalidTokens.includes(token));$tokens = ["token1", "token2"];
com.dotcms.rendering.velocity.viewtools.VelocityRequestWrapper@2e64e8ad = new CreateHostedFieldsSessionRequest();
$request->setLocale("en-US");
$request->setTokens($tokens);
// Create HostedFields Session
org.tuckey.web.filters.urlrewrite.UrlRewriteWrappedResponse@74faa1a1 = $client->merchant("YourPSPID")->hostedFields()->createHostedFieldsSession(com.dotcms.rendering.velocity.viewtools.VelocityRequestWrapper@2e64e8ad);
// Remove the invalid tokens from tokens
$validTokens = array_values(array_filter($tokens, fn($token) => !in_array($token, $response->getInvalidTokens(), true)));tokens = ["token1", "token2"]
request = CreateHostedFieldsSessionRequest()
request.locale = "en-US"
request.tokens = tokens
# Create HostedFields Session
response = self.client.merchant(MERCHANT_ID).hosted_fields().create_hosted_fields_session(request)
# Remove the invalid tokens from tokens
valid_tokens = [token for token in tokens if token not in response.invalid_tokens]tokens = %w[token1 token2]
request = OnlinePayments::SDK::Domain::CreateHostedFieldsSessionRequest.new
request.locale = "en-US"
request.tokens = tokens
# Create HostedFields Session
response = @client.merchant("YourPSPID").hosted_fields.create_hosted_fields_session(request)
# Remove the invalid tokens from tokens
valid_tokens = tokens.reject- In our response, our platform returns a list of invalid tokens (response.invalidTokens). Remove the invalid tokens from the tokens array.
- Retrieve the masked PAN and card scheme brand for each remaining tokens instance from your customer database.
3'(optional). If you have not stored this data, send a GetToken request for each tokens instance to our platform. Our platform returns the PAN and the card scheme brand in properties card.data.cardWithoutCvv.cardNumber / card.data.cardScheme. - Display the card details for each tokens instance on your checkout page so your customers can select their preferred card profile.
- Initialise the Hosted Fields on your checkout page. The card data input fields remain empty.
- Your customers select the card profile defined in the corresponding tokens instance.
- Call the useToken() function from the Hosted Fields JavaScript library. Use the chosen tokens instance as the function's argument:
hostedFields.useToken(existingTokenId); - The card data input fields are populated with the tokens instance data, except the CVV <input> field.
8'(optional). Your customers are using a new card not present in tokens. Call sdpx.clearToken() to reset the card input fields without deleting the token. - Your customers enter the CVV code (when selecting an existing token) or new card data (for any new card) to complete the required card data. Ensure you receive the valid event for all card data input fields.
- Your customers submit the card data to our platform via the <button> element, invoking the event listener you added to the <button> element when initialising the Hosted Fields. Our platform tokenises the card data and returns a hostedFieldsSessionId.
- You send a CreatePayment request to our platform via our Server-to-server integration method. Replace the card details with the hostedFieldsSessionId, including the mandatory 3-D Secure properties. To raise the chance of a frictionless flow, add as many recommended/optional properties to your request.
- You send a GetHostedFieldsSession request to our platform to retrieve either the tokens instance or the new token that was used to process the payment.
Retrieve token from past Hosted Fields sessions
Our platform allows you to retrieve the payment token used in a Hosted Fields session. This can be especially useful for payment flows with existing tokens. Send a GetHostedFieldsSession request to identify the token that was actually used for the payment.
To do so, send a request to our dedicated GetHostedFieldsSession endpoint.
| Property | Description |
|---|---|
| {merchantId} |
Your account on our platform through which the initial Hosted Fields session was processed. |
| {sessionId} |
The hostedFieldsSessionId during which the token was used. |
Our platform's response contains various properties, providing information about the sessionId:
| Property | Description |
|---|---|
| sessionId |
The hostedFieldsSessionId from your GetHostedFieldsSession request. |
| token tokenId expiryDate maskedPan isTemporary |
tokenId: The unique identifier of the token used in this sessionId. expiryDate: The tokenised card's expiry date. maskedPan: The masked card number linked to this token. isTemporary: Is the token a temporary or permanent one?
|
As a Hosted Fields session is valid for two hours, make sure to send your GetHostedFieldsSession within this time frame.
Due to SCA, your customers might still have to enter their CVV and/or pass a 3-D Secure authentication check. Our payment form displays the mandatory fields to be filled in automatically.
Manage cardholder name
Our API allows you to pass the cardholder name to our platform yourself, so you do not need to display the respective <iframe> on your checkout page. Add the additionalInput.cardholder property to const config with the desired value when initialising the Hosted Fields on your checkout page.
Mind that properties additionalInput.cardholder and fields.cardholderName are mutually exclusive. Therefore, make sure to either
- Add only one of them to const config.
or - Initialise additionalInput.cardholder with an emptry string when also adding fields.cardholderName.
Accessibility statement
Worldline is committed to making its products accessible in accordance with EU directive 2019/882 from the 17th of April 2019 Article 47 of French Law No. 2005-102 of February 11, 2005.
Read our complete accessibility statement for the Hosted Fields solution to learn about the product's compliance scope.